Wednesday, 16 October 2024

How To Bicycle Faster: Proven Tips for Speed Boost

To bicycle faster, improve your fitness and optimize your riding technique. Use a lighter bike and maintain a streamlined posture.

Cycling faster involves strategic training and efficient techniques. Start by incorporating interval training into your routine. Short bursts of high intensity followed by recovery periods enhance your speed and stamina. Keep your bike in top condition by regularly servicing it.

Ensure the tires are properly inflated and the chain is lubricated. A well-maintained bike can significantly improve your performance. Adjust your riding posture to minimize air resistance. Tuck in your elbows and lower your torso to reduce drag. Consistent practice and a focus on these key areas will help you achieve faster cycling speeds.

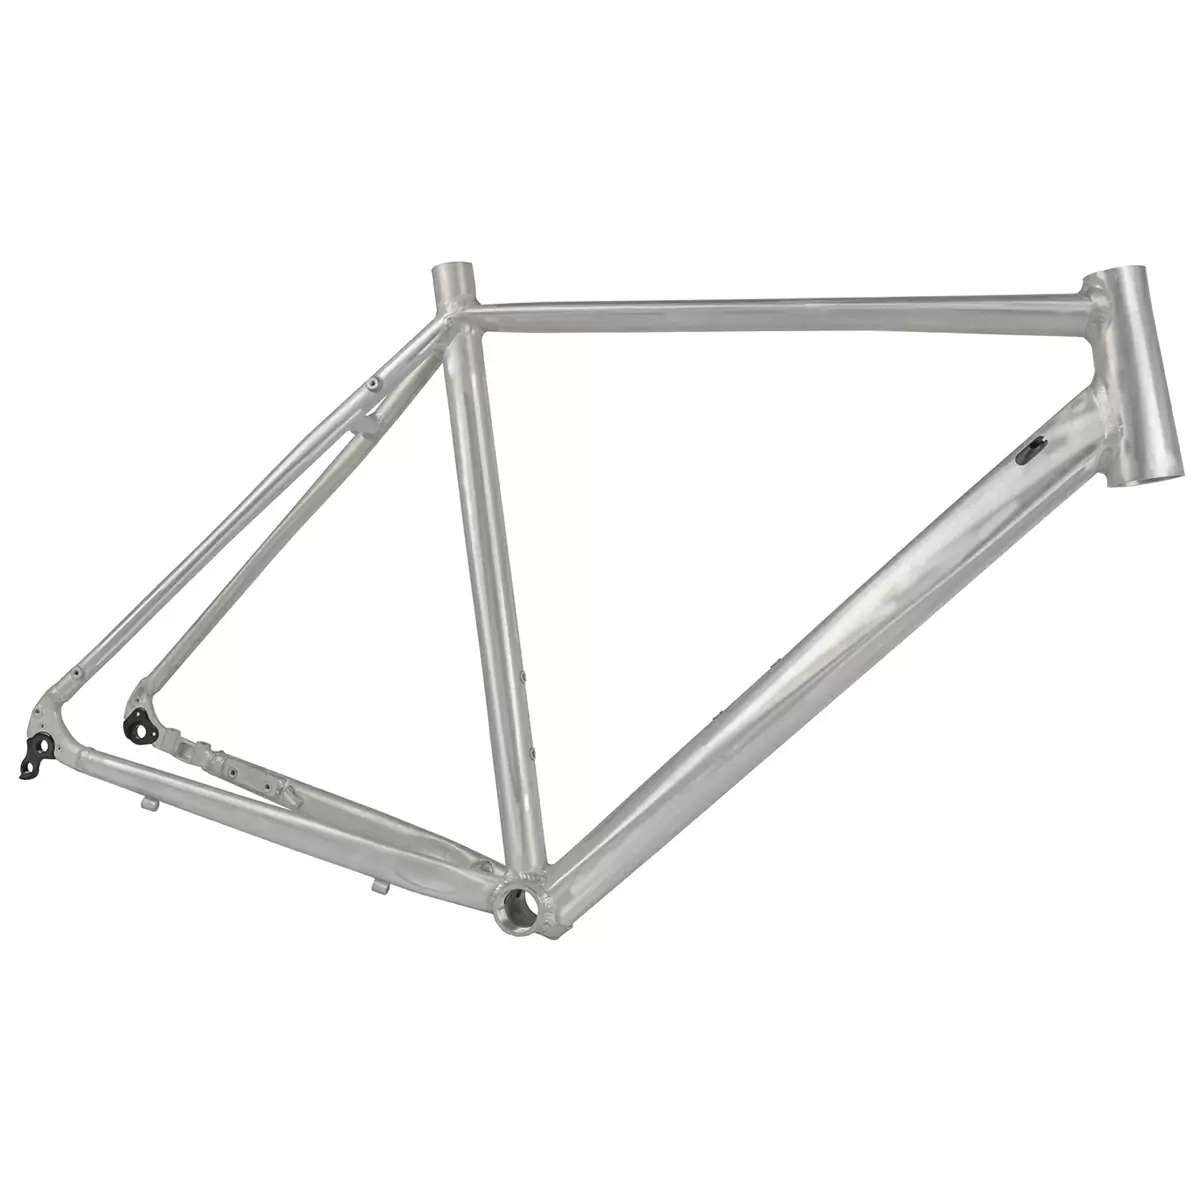
Choosing The Right Bike

Choosing the right bike is crucial for increasing your cycling speed. A well-suited bike can make your ride smoother and faster. In this section, we'll explore the types of bikes and the importance of a proper bike fit.

Types Of Bikes

Different bikes serve different purposes. Here are some common types:

  • Road Bikes: Designed for speed on paved roads. They have lightweight frames and thin tires.
  • Mountain Bikes: Built for off-road trails. They have sturdy frames and thick, knobby tires.
  • Hybrid Bikes: A mix of road and mountain bikes. They are versatile and good for general use.
  • Time Trial Bikes: Optimized for aerodynamics. These bikes are for competitive racing.

Choosing the right type depends on your riding style and goals.

Bike Fit

A proper bike fit is essential for comfort and efficiency. Here are key factors:

  1. Frame Size: Ensure the frame matches your height. A wrong frame size can cause discomfort.
  2. Saddle Height: Adjust the saddle so your leg is almost straight at the bottom of the pedal stroke.
  3. Handlebar Position: Handlebar height and reach should be comfortable. It prevents strain on your back and shoulders.
  4. Cleat Position: Align your cleats properly. It improves pedal efficiency and reduces injury risk.

Consider getting a professional bike fitting. It ensures every adjustment is optimal for you.

How To Bicycle Faster: Proven Tips for Speed Boost

Credit: www.wikihow.com

Optimizing Your Gear

To bicycle faster, optimizing your gear is essential. Using the right components and accessories can significantly improve your speed. Below are key areas to focus on.

Lightweight Components

Switching to lightweight components can make a huge difference. Lighter parts mean less weight to push, making you faster.

  • Carbon Fiber Frame: Consider investing in a carbon fiber frame. It's lightweight and strong.
  • Lightweight Wheels: Choose wheels made from carbon or other light materials. They reduce rotational weight.
  • Aluminum Components: Use aluminum for your handlebars, seat post, and stem. It's lighter than steel.

Aerodynamic Accessories

Aerodynamic accessories help reduce wind resistance. This allows you to slice through the air more easily.

Accessory Benefit
Aero Helmet Reduces drag on your head.
Aero Bars Improves your riding position.
Aero Wheels Reduces wind resistance on wheels.

Using these accessories can give you a speed advantage. They streamline your bike and body.

Enhancing Your Riding Technique

Improving your riding technique can greatly enhance your cycling speed. Let's break down the key areas to focus on for a faster ride.

Proper Posture

Maintaining a proper posture is essential for speed. Keep your back straight and avoid slouching. Bend your elbows slightly to absorb shocks. This reduces strain on your back and wrists.

Position your hands on the handlebars correctly. This ensures you can control the bike better. Make sure your knees move in a straight line. This prevents knee injuries and increases pedaling efficiency.

Efficient Pedaling

Efficient pedaling involves more than just pushing down. Use the entire pedal stroke effectively. Divide the pedal stroke into four parts:

  • Top: Push forward
  • Down: Push down
  • Bottom: Pull back
  • Up: Pull up

Practice pedaling in circles to use all muscle groups. This maximizes power transfer and reduces fatigue.

Use a high cadence to pedal efficiently. Aim for 80-100 revolutions per minute (RPM). This puts less strain on your muscles and helps maintain a steady speed.

Incorporating these tips into your daily rides can help you cycle faster. Focus on proper posture and efficient pedaling to see noticeable improvements.

Training For Speed

Want to bicycle faster? Focus on training for speed. This section covers two main areas: interval training and strength workouts. Both methods can help you improve your cycling performance.

Interval Training

Interval training involves alternating between high and low-intensity cycling. It boosts your speed and endurance.

High-Intensity Phase Low-Intensity Phase
30 seconds of sprinting 90 seconds of easy pedaling
1 minute of fast cycling 2 minutes of slow cycling

Repeat these intervals 5 to 10 times. Rest for 5 minutes between sets.

Strength Workouts

Strength workouts build the muscles needed for cycling. Focus on key muscle groups like the legs, core, and back.

  • Squats
  • Lunges
  • Planks
  • Deadlifts

Perform these exercises 2-3 times a week. Use proper form to avoid injury. Add resistance gradually for better results.

Nutrition And Hydration

How To Bicycle Faster: Nutrition and Hydration

Proper nutrition and hydration are key to cycling faster. Your body needs fuel and water to perform its best. Let's explore how to optimize your diet and hydration.

Pre-ride Meals

Eating the right foods before a ride boosts your energy levels. Aim for a balanced meal with carbs, proteins, and fats.

  • Carbs: Provide quick energy. Try oatmeal, bananas, or whole-grain bread.
  • Proteins: Help repair muscles. Include eggs, yogurt, or lean meats.
  • Fats: Offer sustained energy. Nuts, avocado, and olive oil are great choices.

Eat 2-3 hours before your ride. This gives your body time to digest.

Hydration Strategies

Staying hydrated helps you cycle faster. Drink plenty of water throughout the day.

Here's a simple hydration plan:

  1. Before the ride: Drink 16-20 ounces of water.
  2. During the ride: Sip water every 15-20 minutes. Aim for 8-10 ounces per hour.
  3. After the ride: Replenish lost fluids. Drink at least 16 ounces.

Consider sports drinks for rides longer than an hour. They replace lost electrolytes.

Time Action Amount
Before Ride Drink Water 16-20 ounces
During Ride Sip Water 8-10 ounces per hour
After Ride Replenish Fluids 16 ounces

Fuel your body right. Stay hydrated. Cycle faster!

How To Bicycle Faster: Proven Tips for Speed Boost

Credit: www.reddit.com

Maintenance And Upkeep

Keeping your bicycle in top condition is crucial for speed. Proper maintenance ensures your bike performs at its best. Small issues can slow you down. Regular upkeep can make a big difference. Let's delve into important areas.

Regular Tune-ups

Regular tune-ups are essential. A well-tuned bike rides faster. Aim for a tune-up every three months. Check the gears, brakes, and chain. Ensure everything works smoothly. A professional tune-up includes:

  • Adjusting gears
  • Inspecting the chain
  • Checking the brakes
  • Lubricating moving parts

These steps help maintain optimal performance. A smooth-running bike means less effort and more speed.
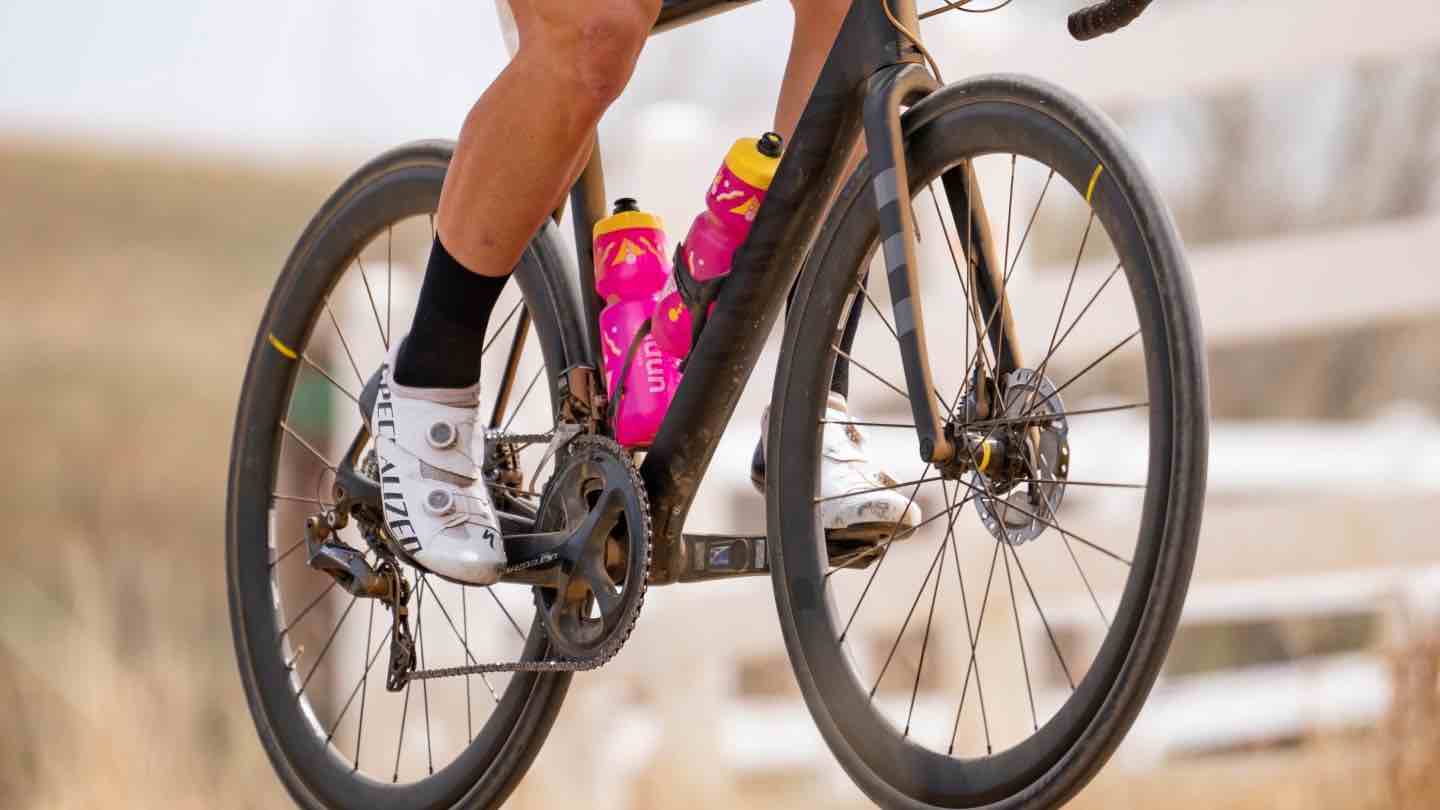
Tire Pressure

Proper tire pressure is key to riding faster. Low tire pressure creates more rolling resistance. This slows you down. Check your tire pressure before every ride. Use a pressure gauge for accuracy. Follow the manufacturer's recommended pressure range.

Here's a quick guide:

Tire Type Pressure (PSI)
Road Bike 80-130 PSI
Mountain Bike 30-50 PSI
Hybrid Bike 50-70 PSI

Always check for punctures. Replace old or worn tires. Proper tire maintenance can drastically improve your speed.

Mindset And Mental Focus

Improving your bicycle speed requires more than just physical training. Your mindset and mental focus play crucial roles in reaching peak performance. Understanding and harnessing these mental strategies can help you ride faster and more efficiently.

Goal Setting

Setting clear goals can significantly enhance your cycling performance. Goals give you a target to aim for and keep you motivated. They can be categorized into short-term, medium-term, and long-term objectives.

Goal Type Example
Short-term Improve speed by 1 km/h this week
Medium-term Complete a 50 km ride in 2 hours
Long-term Finish a 100 km race in under 4 hours

Write down your goals and review them regularly. This helps keep you focused and accountable.

Visualization Techniques

Visualization can be a powerful tool for cyclists. By imagining yourself riding faster, you can train your brain to achieve those speeds. This technique involves creating a mental image of your desired performance.

  • Find a quiet place to sit.
  • Close your eyes and picture yourself cycling at your target speed.
  • Imagine the feeling of the wind, the road, and your legs moving smoothly.
  • Repeat this visualization daily for 5-10 minutes.

Consistent visualization can build confidence and improve your actual performance on the bike.

Safety And Efficiency

How To Bicycle Faster: Safety and Efficiency

Riding your bicycle faster is exciting. But it must be safe and efficient. Focusing on safety and efficiency will help you ride smoothly. Here are some tips to help you achieve that.

Road Awareness

Road awareness is crucial for safe riding. Always look ahead and be alert. Watch out for cars, pedestrians, and other cyclists.

  • Stay in your lane.
  • Use bike lanes if available.
  • Obey traffic signals and signs.

Use hand signals to communicate your intentions. This helps others predict your moves. Wear bright clothing to be visible, especially at night.

Energy Conservation

Conserving energy helps you ride faster for longer. Focus on smooth pedaling to save energy. Avoid sudden bursts of speed.

  1. Use a steady pace.
  2. Shift gears appropriately.
  3. Maintain a comfortable cadence.

Keep your bike well-maintained. Lubricate the chain and check tire pressure. A well-maintained bike requires less effort to ride.

Tip Description
Stay Hydrated Drink water to maintain energy levels.
Eat Wisely Consume light snacks for sustained energy.

By focusing on safety and efficiency, you can enjoy faster and smoother rides. Stay alert and conserve your energy for the best cycling experience.

How To Bicycle Faster: Proven Tips for Speed Boost

Credit: m.youtube.com

Frequently Asked Questions

How Can I Increase My Cycling Speed?

To increase your cycling speed, focus on interval training and strength workouts. Maintain a consistent cadence and invest in a quality bike.

What Are The Best Exercises For Cyclists?

The best exercises for cyclists include squats, lunges, and core workouts. These exercises improve leg strength and stability.

How Does Bike Weight Affect Speed?

A lighter bike reduces the effort needed to pedal, increasing speed. Invest in lightweight components for better performance.

Should I Use Clipless Pedals For Cycling Faster?

Yes, clipless pedals improve pedaling efficiency and power transfer. They help you cycle faster and more efficiently.

Conclusion

Mastering the techniques to bicycle faster can greatly enhance your cycling experience. Focus on proper gear, posture, and regular practice. Remember, consistency is key. Use these tips to see significant improvements. Happy cycling and enjoy the ride!

Tuesday, 15 October 2024

Aluminum Gravel Bike Frame: Ultimate Guide to Durability & Performance

An aluminum gravel bike frame offers durability, affordability, and performance. It's ideal for versatile riding on varied terrains.

Aluminum gravel bike frames are known for their strength and lightweight properties. Riders appreciate their balance of affordability and performance, making them a popular choice for both beginners and seasoned cyclists. These frames can handle rough, uneven surfaces while providing a comfortable ride.

Aluminum is resistant to corrosion, ensuring longevity and minimal maintenance. This frame material offers stiffness for better power transfer and responsiveness, crucial for challenging trails. With their rugged build, aluminum gravel bike frames are perfect for adventurers seeking reliability without breaking the bank. They provide an excellent foundation for customizing your bike to suit your riding style and needs.

Aluminum Gravel Bike Frame: Ultimate Guide to Durability & Performance

Credit: www.ridewill.com

Introduction To Aluminum Gravel Bikes

Gravel bikes have been gaining popularity among cyclists. These bikes offer versatility and durability for various terrains. One material stands out for gravel bike frames: aluminum. Let's dive into why aluminum is a great choice for gravel bikes.

What Is A Gravel Bike?

A gravel bike is designed to handle multiple surfaces. From paved roads to dirt trails, they excel everywhere. They come with wider tires for better grip and comfort. Gravel bikes also have a relaxed geometry for long rides.

  • Wider tires for increased traction
  • Relaxed geometry for comfort on long rides
  • Versatile gearing for various terrains

These features make gravel bikes suitable for adventure riding. They combine elements of road bikes and mountain bikes.

Why Choose Aluminum?

Aluminum is a popular material for bike frames. It offers several advantages that make it ideal for gravel bikes.

Feature Benefit
Lightweight Easy to handle and accelerate
Affordable Cost-effective without compromising quality
Durable Resistant to rust and wear

Aluminum frames are also known for their stiffness. This feature helps in better power transfer. It means more efficient pedaling and faster rides. Additionally, aluminum frames are easier to manufacture. This lowers the overall cost.

Aluminum gravel bikes offer a perfect balance of weight, durability, and cost. They are a great option for riders who want a reliable and affordable bike.

Key Features Of Aluminum Frames

Aluminum gravel bike frames have become a popular choice for cyclists. Their unique features make them stand out. Let's explore some key features that make aluminum frames special.

Strength And Durability

Aluminum frames are known for their strength. They can withstand rough terrains and heavy loads. This makes them ideal for gravel biking. The frames are also highly durable. They resist rust and corrosion, ensuring a long lifespan. Cyclists can rely on aluminum frames for consistent performance over time.

Weight Considerations

One of the biggest advantages of aluminum frames is their lightweight nature. A lighter bike frame means easier handling and faster speeds. This is crucial for competitive cyclists. Below is a table comparing the weight of aluminum frames to other materials:

Material Weight (kg)
Aluminum 1.5
Steel 2.5
Carbon Fiber 1.2

As the table shows, aluminum is lighter than steel but heavier than carbon fiber. This makes it a balanced choice for many cyclists. The lightweight nature of aluminum also contributes to better fuel efficiency. Cyclists can cover longer distances with less effort.

Performance On Various Terrains

The aluminum gravel bike frame delivers excellent performance on diverse terrains. It offers a balance of durability, weight, and comfort. Whether you are navigating rough trails or cruising on smooth roads, this frame excels.

Handling Rough Trails

The aluminum gravel bike frame is designed for tough conditions. It can withstand harsh impacts and vibrations. This makes it ideal for rocky paths and uneven surfaces.

  • Durability: The aluminum frame resists wear and tear.
  • Lightweight: It is easy to handle and maneuver.
  • Shock Absorption: The frame minimizes vibrations from rough terrains.

These features ensure a comfortable ride on rough trails. You can stay in control and enjoy your adventure.

Smooth Road Performance

The aluminum gravel bike frame also excels on smooth roads. It provides a fast and efficient ride. The lightweight nature of aluminum allows for quick acceleration.

  • Speed: The frame's design promotes swift movements.
  • Agility: It responds well to quick changes in direction.
  • Comfort: The frame offers a smooth and pleasant ride.

These qualities make it perfect for long-distance rides on paved roads. You can cover more distance with less effort.

Feature Benefit
Durability Resists wear and tear on rough trails
Lightweight Easy handling and quick acceleration
Shock Absorption Minimizes vibrations for a comfortable ride
Speed Promotes swift movements on smooth roads
Agility Responds well to quick direction changes

In summary, the aluminum gravel bike frame is versatile. It performs well on both rough trails and smooth roads.

Comparing Aluminum To Other Materials

Choosing the right material for a gravel bike frame is crucial. Aluminum stands out due to its unique properties. Let's compare aluminum with steel and carbon fiber to see why.

Aluminum Vs. Steel

Aluminum is much lighter than steel. This makes the bike easier to handle. Aluminum bikes are also more resistant to rust. Steel bikes are heavier but often provide a smoother ride. They can absorb more vibrations from rough terrain.

Criteria Aluminum Steel
Weight Lighter Heavier
Rust Resistance High Low
Ride Comfort Moderate High

Aluminum Vs. Carbon Fiber

Aluminum frames are cheaper than carbon fiber frames. They are also more durable in crashes. Carbon fiber is lighter and can be molded into more aerodynamic shapes. But it is more expensive and less durable in accidents.

  • Aluminum is cost-effective.
  • Carbon Fiber is lightweight but costly.
  • Aluminum offers good durability.
  • Carbon Fiber has better aerodynamics.

Choosing between aluminum and other materials depends on your priorities. Aluminum offers a balance of weight, cost, and durability. It’s a great choice for gravel bike frames.

Maintenance Tips For Aluminum Frames

Maintaining your aluminum gravel bike frame extends its lifespan and ensures a smooth ride. This guide offers essential tips to keep your bike in top shape. Follow these steps for cleaning, care, and preventing corrosion.

Cleaning And Care

Regular cleaning prevents dirt build-up and maintains the bike's look. Use a soft cloth with mild soap and water to clean the frame. Avoid harsh chemicals that can damage the aluminum.

  • Rinse the frame with water first.
  • Apply soap and gently scrub with a soft brush.
  • Rinse off all soap and dry with a clean cloth.

After cleaning, inspect the frame for any damage. Check for cracks, dents, or scratches. Addressing these early prevents bigger issues.

Preventing Corrosion

Corrosion can weaken the frame over time. Keep your bike dry to avoid this problem. Store it in a cool, dry place.

  1. After washing, dry the frame thoroughly.
  2. Apply a thin layer of bike-specific wax or polish.
  3. Check for any signs of rust regularly.

If you ride in wet conditions, clean and dry your bike after each ride. Use anti-corrosion sprays for added protection.

Task Frequency
Cleaning the frame Weekly
Inspecting for damage Monthly
Applying wax or polish Monthly

Following these maintenance tips for aluminum frames ensures your bike stays in excellent condition. Happy riding!

Customizing Your Aluminum Gravel Bike

Customizing your aluminum gravel bike can make your rides more fun. You can change parts or adjust the bike for a better fit. Here are some tips to help you get started.

Upgrading Components

Upgrading components can improve your bike's performance. Start with the wheels. Lighter wheels can make your bike faster. You can also change the tires. Choose tires that suit your riding style.

  • Wheels: Look for lighter and stronger wheels.
  • Tires: Choose tires with good grip and durability.

Next, think about the brakes. Disc brakes can offer better stopping power. You might also upgrade the drivetrain. A smoother drivetrain makes shifting gears easier.

  • Brakes: Disc brakes provide better control and stopping power.
  • Drivetrain: A high-quality drivetrain ensures smooth gear changes.

Personalizing The Fit

A good bike fit makes your rides more comfortable. Start with the saddle. A comfortable saddle can prevent soreness. You can also adjust the handlebars. Correct handlebar height reduces strain on your back.

  • Saddle: Choose a saddle that suits your riding style.
  • Handlebars: Adjust handlebar height for better comfort.

You might need to change the stem. A shorter stem can make steering more responsive. Adjusting the seat post height can also help. Proper seat height improves pedaling efficiency.

  • Stem: A shorter stem improves bike handling.
  • Seat Post: Correct seat height enhances pedaling power.

Top Aluminum Gravel Bike Models

Finding the right aluminum gravel bike can be challenging. With various models available, it's important to know which ones stand out. This guide covers some top aluminum gravel bikes. Here are some budget-friendly and high-end choices.

Budget-friendly Options

Model Price Key Features
Raleigh Willard 1 $800
  • 6061 Aluminum Frame
  • 16-Speed Shimano Claris
  • Mechanical Disc Brakes
Diamondback Haanjo 3 $1,000
  • Endurance Geometry
  • 700c Wheels
  • Fender and Rack Mounts
Marin Gestalt $1,100
  • Smooth Welded Frame
  • Full Carbon Fork
  • 1x10 Drivetrain

High-end Choices

Model Price Key Features
Cannondale Topstone 1 $2,100
  • SmartForm C2 Aluminum
  • Full Carbon Fork
  • Shimano GRX 800
Specialized Diverge E5 Elite $2,300
  • E5 Premium Aluminum
  • Future Shock 1.5
  • Shimano 105 Groupset
Giant Revolt Advanced 2 $2,500
  • ALUXX SL-Grade Frame
  • Advanced-Grade Composite Fork
  • Shimano GRX 600
Aluminum Gravel Bike Frame: Ultimate Guide to Durability & Performance

Credit: www.bikeradar.com

Conclusion And Final Thoughts

Aluminum gravel bike frames offer a great blend of durability, affordability, and performance. They are a top choice for many cyclists. This section will wrap up our discussion and help you make an informed decision.

Summarizing Key Points

Let’s summarize the key points about aluminum gravel bike frames:

  • Durability: Aluminum frames are strong and can withstand rough terrains.
  • Affordability: They are budget-friendly compared to carbon or titanium frames.
  • Weight: Aluminum frames are lightweight, making them easy to handle.
  • Performance: These frames offer a good balance of stiffness and comfort.

Making The Right Choice

Choosing the right bike frame depends on your needs and preferences. Consider the following factors:

Factor Why It Matters
Budget Aluminum frames are cost-effective for budget-conscious riders.
Riding Style Ideal for both casual rides and competitive racing.
Maintenance Aluminum requires low maintenance and is easy to care for.
Weight Lightweight frames help in better control and speed.

Aluminum gravel bike frames are a versatile and practical option. They offer a balance of strength, affordability, and performance. Make sure to match the frame to your cycling needs and enjoy your rides!

Aluminum Gravel Bike Frame: Ultimate Guide to Durability & Performance

Credit: www.ridewill.com

Frequently Asked Questions

What Are The Benefits Of An Aluminum Gravel Bike Frame?

An aluminum gravel bike frame is lightweight and durable. It offers excellent performance on varied terrains. The material is also cost-effective and resistant to rust. Aluminum frames provide a good balance between weight and strength.

How Does Aluminum Compare To Carbon For Gravel Bikes?

Aluminum is generally more affordable and durable than carbon. It offers a stiff and responsive ride. Carbon frames are lighter but more expensive. Aluminum is a great option for budget-conscious riders.

Are Aluminum Gravel Bikes Good For Beginners?

Yes, aluminum gravel bikes are excellent for beginners. They are durable and cost-effective. The material offers a balanced performance. Beginners will find them easy to handle on diverse terrains.

How Do I Maintain An Aluminum Gravel Bike Frame?

Maintaining an aluminum gravel bike frame is simple. Regularly clean the frame to remove dirt. Check for any signs of wear or damage. Lubricate the moving parts and tighten bolts as needed.

Conclusion

An aluminum gravel bike frame offers durability, lightweight performance, and affordability. It's perfect for both beginners and seasoned cyclists. Whether you're on rugged trails or smooth roads, this frame ensures a reliable ride. Invest in an aluminum gravel bike frame and elevate your cycling adventures.

Your journey awaits with unmatched quality and performance.

Monday, 14 October 2024

Why A Bicycle Cannot Stand On Its Own: The Scientific Facts

A bicycle cannot stand on its own because it lacks a stable base and balance. It requires support or motion to remain upright.

Bicycles are fascinating machines that combine simplicity and efficiency. Their design hinges on basic principles of physics and engineering. A bike remains upright while moving due to dynamic stability. The wheels generate a gyroscopic effect, which helps maintain balance. At rest, a bicycle needs a kickstand or external support.

This is because the center of gravity and narrow base make it prone to tipping over. Understanding these fundamentals can enhance your cycling experience and appreciation for this remarkable mode of transport. Whether you’re a casual rider or a cycling enthusiast, knowing the science behind your bike can be both interesting and beneficial.

Why A Bicycle Cannot Stand On Its Own: The Scientific Facts

Credit: www.gatesnotes.com

Physics Of Bicycle Balance

Physics of Bicycle Balance

Have you ever wondered why a bicycle cannot stand on its own? The answer lies in the fascinating world of physics. Understanding the balance of a bicycle involves exploring two main concepts: the center of gravity and the gyroscopic effect.

Center Of Gravity

The center of gravity is the point where the entire weight of the bicycle is concentrated. It is usually located near the middle of the bicycle, between the wheels. When a bicycle is stationary, it becomes challenging to keep the center of gravity directly above the wheels.

If the center of gravity shifts even slightly, the bicycle will tip over. This happens because the weight is no longer balanced. To keep a bicycle upright, the rider needs to adjust the position constantly. The rider's movements help keep the center of gravity aligned.

Gyroscopic Effect

The gyroscopic effect plays a crucial role in bicycle balance. When the wheels of a bicycle spin, they create a force known as angular momentum. This force helps to stabilize the bicycle and resist tipping.

The faster the wheels spin, the stronger the gyroscopic effect becomes. This is why it's easier to balance a bicycle when riding at higher speeds. At lower speeds, the gyroscopic effect is weaker, making it harder to keep the bicycle upright.

Here’s a simple breakdown of the gyroscopic effect:

  • Angular Momentum: The spinning wheels create a stabilizing force.
  • Speed: Faster spinning wheels generate more stability.
  • Balance: Helps the rider maintain an upright position.
Concept Description
Center of Gravity The point where the bicycle's weight is balanced.
Gyroscopic Effect The stabilizing force created by spinning wheels.
Why A Bicycle Cannot Stand On Its Own: The Scientific Facts

Credit: www.theproscloset.com

Role Of Rider In Stability

A bicycle cannot stand on its own because of the physics involved. The rider plays a crucial role in keeping the bicycle stable. Their body movements and balancing techniques are essential for preventing the bicycle from falling.

Body Movements

Riders use their body movements to maintain balance. Leaning left or right helps counteract the bicycle's natural tendency to fall. This continuous adjustment keeps the bicycle upright.

Small shifts in the rider's weight are important. Even slight movements can make a big difference. These adjustments are often made subconsciously by experienced riders.

Balancing Techniques

Riders use various balancing techniques to stay upright. One common method is to steer into a fall. If the bicycle starts to fall left, the rider turns the handlebars left.

Another technique involves adjusting speed. Faster speeds create more stability. This is why beginners often find it harder to balance at slow speeds.

Hand positioning also aids in balance. Holding the handlebars firmly allows for quicker adjustments. This helps in maintaining control over the bicycle.

Influence Of Bicycle Design

Why A Bicycle Cannot Stand On Its Own: Influence of Bicycle Design

The design of a bicycle plays a crucial role in its stability. Two key factors are frame geometry and wheel alignment. These elements determine how a bicycle behaves when stationary.

Frame Geometry

The frame geometry includes the angles and lengths of the bike's tubes. It affects the bike's center of gravity.

  • Top Tube Length: Affects rider position.
  • Head Tube Angle: Influences steering.
  • Seat Tube Angle: Changes pedaling efficiency.

A bike with a low center of gravity is more stable. A higher center of gravity makes it easier to tip over.

Wheel Alignment

Wheel alignment is crucial for balance. Misaligned wheels can cause instability.

Factor Effect on Stability
Wheelbase Longer wheelbase adds stability.
Trail More trail improves straight-line stability.

Proper wheel alignment ensures the bike can roll smoothly. Misalignment can make the bike wobble.

Impact Of Speed On Balance

The speed of a bicycle greatly affects its balance. Understanding this can help riders improve their cycling skills. Let's explore how speed influences stability.

Low-speed Instability

At low speeds, a bicycle struggles to stay upright. The rider must constantly adjust the handlebars. This is due to the bicycle's gyroscopic effect being minimal at slow speeds.

Here are some key points to consider:

  • The wheels spin slowly, offering less stability.
  • Riders need to steer more to maintain balance.
  • Small movements can cause the bike to tip over.

High-speed Stability

At higher speeds, a bicycle becomes more stable. The gyroscopic effect of the wheels increases, helping the bike stay upright.

Important factors for high-speed stability include:

  • The wheels spin faster, creating a stabilizing force.
  • Less handlebar adjustments are needed to keep balance.
  • The bike can maintain a straight path more easily.

Here's a table to summarize the differences:

Speed Stability Rider Effort
Low Speed Poor High
High Speed Good Low

Understanding these principles can help cyclists ride more efficiently and safely.

Ground Interaction

Understanding why a bicycle cannot stand on its own involves the concept of ground interaction. The way the ground interacts with the bicycle's tires plays a crucial role. Let's explore this in detail.

Friction Forces

Friction forces are vital in keeping a bicycle stable. When a bicycle moves, friction between the tires and the ground provides stability. But when the bicycle is stationary, these forces are not enough to keep it upright.

Imagine the bicycle's tires as two points touching the ground. The friction at these points is minimal when the bicycle is still. This is because friction depends on the weight and surface area in contact. For a bicycle, the contact points are very small.

Without enough friction, the bicycle cannot resist falling over. The balance is delicate, and any slight movement can tip it over. This is why you need to hold the bike or use a stand when it's not moving.

Surface Texture

The surface texture of the ground also affects a bicycle's ability to stand. Smooth surfaces provide less grip for the tires. Rough surfaces offer more friction but can still be insufficient.

Consider riding on a smooth tile floor compared to a gravel path. On the tile floor, the bicycle slips easily because the surface lacks texture. On the gravel, the tires grip better but still don't prevent tipping over when stationary.

A table can help illustrate how different surfaces interact with the tires:

Surface Type Friction Level Stability
Tile Low Very Unstable
Asphalt Medium Unstable
Gravel High Still Unstable

As the table shows, different surfaces offer varying levels of friction. Yet, even the highest friction surface cannot keep a bicycle standing on its own.

  • Friction forces are too weak when a bicycle is stationary.
  • Surface texture impacts tire grip but not enough to maintain balance.

Understanding these factors helps explain why you need to balance or support a bicycle when it is not in motion.

Environmental Factors

Why A Bicycle Cannot Stand On Its Own: Environmental Factors

Environmental factors play a key role in why a bicycle cannot stand on its own. These factors include wind resistance and terrain slope. Understanding these can help you grasp the science behind a bicycle's stability.

Wind Resistance

Wind resistance can push a bicycle over. Even a gentle breeze can make it wobble. Strong winds exert force on the bicycle. This force disturbs its balance. The bike tips over as a result.

A standing bicycle has a small contact area with the ground. Wind easily pushes against its frame. This makes it unstable. Windy conditions are especially challenging. They make it hard for a bike to stay upright.

Terrain Slope

The slope of the terrain also affects a bicycle's stability. Flat ground provides a better chance for standing. On a slope, gravity pulls the bike downhill. This pull makes it harder for the bike to stay upright.

Even a slight incline can cause problems. The bike will lean and eventually fall over. On uneven ground, the contact points are fewer. This makes balance even more difficult.

Factor Effect on Bicycle
Wind Resistance Pushes the bike over, especially in strong winds.
Terrain Slope Makes the bike lean and fall due to gravity.

Historical Insights

Why A Bicycle Cannot Stand On Its Own: Historical Insights

The journey of the bicycle has been fascinating. Early designs and stability issues shaped today's bikes. Let's delve into the past to understand this.

Early Bicycle Designs

Early bicycles were simple yet innovative. The Draisine, invented by Karl Drais in 1817, had no pedals. Riders pushed their feet against the ground. This design was basic and lacked stability. Next came the Penny-farthing with its large front wheel. While it looked impressive, it was hard to balance. The high center of gravity made it prone to tipping.

Evolution Of Stability

Stability improved over time. The Safety Bicycle, introduced in the 1880s, had equal-sized wheels. This design lowered the center of gravity. It became easier to balance and ride. The addition of the chain drive further stabilized the bicycle. Brakes and pneumatic tires also enhanced control and comfort.

Today, modern bicycles are marvels of engineering. They combine the lessons of the past with advanced materials and designs.

Future Innovations

As technology advances, new innovations aim to solve the age-old problem of bicycle stability. These future innovations promise to make bicycles safer and more user-friendly.

Self-balancing Technologies

Self-balancing technologies are at the forefront of these advancements. These systems use sensors and gyroscopes to keep the bicycle upright. They adjust the bike's balance automatically, making it easier for riders. Imagine a bicycle that can balance itself at a stoplight. This would be a game-changer for urban commuters.

One exciting development is the self-balancing bike by Google X. This bike uses machine learning to stay upright. Another example is the GyroCycle, which employs gyroscopic technology. These innovations reduce the risk of falling, especially for new riders.

Advanced Materials

Advanced materials also play a significant role in future bicycle designs. New materials can make bikes lighter and more stable. For example, carbon fiber is both strong and lightweight. It allows for better control and balance.

Another promising material is graphene. It is incredibly strong and flexible. A graphene frame can absorb shocks better, keeping the bicycle steady. These materials not only improve balance but also enhance the overall riding experience.

Here is a table of some advanced materials and their benefits:

Material Benefits
Carbon Fiber Lightweight, Strong
Graphene Flexible, Shock-Absorbing
Titanium Durable, Corrosion-Resistant

These advanced materials and self-balancing technologies are paving the way for the bicycles of the future. They promise a safer and more enjoyable riding experience for everyone.

Why A Bicycle Cannot Stand On Its Own: The Scientific Facts

Credit: www.quarkexpeditions.com

Frequently Asked Questions

Why Can't A Bicycle Stand Still?

A bicycle can't stand still due to its need for forward momentum. Without movement, it lacks the balance provided by gyroscopic and inertia forces.

How Does Balance Work On A Bicycle?

Balance on a bicycle involves gyroscopic effects and steering adjustments. These help in maintaining stability when it's in motion.

What Forces Keep A Bicycle Upright?

Gyroscopic forces and steering inputs help keep a bicycle upright. These forces are effective only when the bicycle is moving.

Does Speed Affect Bicycle Balance?

Yes, speed positively affects bicycle balance. Higher speeds increase gyroscopic forces, making it easier to maintain stability.

Conclusion

A bicycle's inability to stand on its own is a fascinating scientific fact. This phenomenon is due to the principles of balance and physics. Understanding these principles can enhance our appreciation of everyday objects. Next time you see a bicycle, remember the science behind its need for support.

Sunday, 13 October 2024

How Long Does It Take To Become A Good Cyclist: Expert Tips

Becoming a good cyclist typically takes several months to a few years of consistent practice. Progress depends on dedication, fitness level, and training quality.

Cycling is a rewarding and challenging sport that appeals to many enthusiasts. To become proficient, one must commit to regular training sessions. This involves building endurance, strength, and technical skills. Beginners often start with shorter rides and gradually increase their distance and intensity.

Consistency is key, along with proper nutrition and rest. Joining a cycling club or hiring a coach can accelerate progress. Tracking performance and setting realistic goals helps maintain motivation. With dedication and the right approach, anyone can transform into a skilled cyclist over time.

Introduction To Cycling

Starting a journey in cycling is exciting and rewarding. Cycling helps improve fitness and mental well-being. But, how long does it take to become a good cyclist? This depends on various factors including dedication, training, and consistency. Let's explore the basics and benefits of cycling.

Why Cycling

Cycling is a great way to stay active. It suits all ages and fitness levels. Beginners and pros can enjoy it alike. Here are some reasons to start cycling:

  • Accessibility: You can cycle anywhere and anytime.
  • Low Impact: Cycling is gentle on the joints.
  • Fun: Cycling can be a social and enjoyable activity.

Benefits Of Cycling

Cycling offers numerous benefits for both mind and body. Here are some key benefits:

Benefit Description
Fitness Cycling improves cardiovascular health and strengthens muscles.
Mental Health Cycling reduces stress and improves mood.
Weight Management Cycling burns calories and helps maintain a healthy weight.
Environment Cycling is eco-friendly and reduces carbon footprint.

Setting Realistic Goals

Becoming a good cyclist takes time and effort. Setting realistic goals helps you stay motivated and measure progress. Let’s discuss how to set short-term and long-term goals.

Short-term Goals

Short-term goals are achievable within a few weeks or months. They keep you focused and provide quick wins.

  • Ride Regularly: Aim to ride 3-4 times a week.
  • Increase Distance: Add 1-2 miles to your rides weekly.
  • Improve Speed: Try to ride 1 mph faster each week.

Track your progress with a cycling app. Celebrate small victories to stay motivated.

Long-term Goals

Long-term goals take several months or even years to achieve. They require more dedication and planning.

  • Complete a Century Ride: Aim to ride 100 miles in one day.
  • Join a Cycling Club: Participate in group rides and events.
  • Compete in Races: Train for and enter local cycling races.

Break long-term goals into smaller milestones. Create a training plan and adjust as needed.

Setting realistic goals helps you become a better cyclist over time. Stay committed and enjoy the journey.

Choosing The Right Equipment

Becoming a good cyclist starts with choosing the right equipment. The right bike and gear make cycling easier and more enjoyable. Here, we discuss Bike Selection and Essential Gear to help you on your journey.

Bike Selection

Choosing the right bike is crucial. There are many types of bikes, each suited for different terrains and styles. Here's a quick guide:

Type of Bike Best For
Road Bikes Speed and long-distance rides on paved roads
Mountain Bikes Off-road trails and rough terrains
Hybrid Bikes A mix of road and off-road cycling
Electric Bikes Extra power for uphill climbs and long distances

Make sure the bike fits your height and riding style. A bike shop can help you find the perfect fit.

Essential Gear

The right gear keeps you safe and comfortable. Here’s a list of essential cycling gear:

  • Helmet: Protects your head in case of accidents.
  • Gloves: Provides better grip and protects your hands.
  • Cycling Shorts: Reduces chafing and adds comfort.
  • Water Bottle: Keeps you hydrated during long rides.
  • Lights: Makes you visible in low light conditions.

Investing in quality gear can enhance your cycling experience. It also ensures you stay safe on the road.

How Long Does It Take To Become A Good Cyclist: Expert Tips

Credit: m.youtube.com

Training Plans

Becoming a good cyclist requires a structured training plan. A well-crafted plan helps you improve gradually. It caters to your fitness level and goals. Let's explore different training plans for beginners and advanced cyclists.

Beginner Plans

Starting as a beginner can be exciting and challenging. A simple, structured plan helps you build stamina and skills.

Week Training Days Rest Days Duration
1 3 4 30 minutes
2 3 4 45 minutes
3 4 3 45 minutes
4 4 3 60 minutes

A beginner plan focuses on building basic endurance. You start with shorter rides. Gradually, you increase your ride duration. This plan includes rest days for recovery. Rest days are crucial for muscle recovery and growth.

  • Ride at a comfortable pace
  • Stay hydrated
  • Focus on proper form

Advanced Plans

Advanced cyclists need more intense and varied training plans. The goal is to increase speed, strength, and endurance.

Week Training Days Rest Days Duration
1 5 2 90 minutes
2 6 1 90 minutes
3 6 1 120 minutes
4 6 1 150 minutes

An advanced plan includes longer and more intense rides. It also incorporates interval training and hill climbs. These elements help build speed and power.

  1. Interval training: Short bursts of high intensity
  2. Hill climbs: Builds leg strength
  3. Long rides: Enhances endurance

Advanced plans also require fewer rest days. Your body adapts to the increased workload. Listening to your body is key. Always ensure proper recovery to avoid injuries.

Building Endurance

Building endurance is essential for becoming a good cyclist. It allows riders to go farther and faster without tiring quickly. This section focuses on two crucial aspects: cardio training and strength training.

Cardio Training

Cardio training helps improve your heart and lung capacity. It’s vital for long rides. Start with shorter sessions and gradually increase the time. Aim for at least 30 minutes per session. Use a mix of cycling, running, and swimming. These activities boost your stamina.

Here is a simple cardio plan for beginners:

Week Activity Duration
1 Cycling 30 minutes
2 Running 20 minutes
3 Swimming 30 minutes

Strength Training

Strength training is important for powerful cycling. It helps you tackle tough terrains. Focus on your legs, core, and upper body. Use weights, resistance bands, and bodyweight exercises. Here are some effective exercises:

  • Squats
  • Lunges
  • Planks
  • Push-ups

Perform these exercises 2-3 times a week. Gradually increase the intensity and repetitions. This will build the muscles needed for cycling.

How Long Does It Take To Become A Good Cyclist: Expert Tips

Credit: stagescycling.com

Nutrition And Hydration

To become a good cyclist, focusing on nutrition and hydration is essential. These factors directly influence performance and recovery. Proper nutrition fuels your body, while hydration keeps you going strong.

Balanced Diet

A balanced diet is crucial for cyclists. Your body needs the right mix of nutrients to perform well. Include a variety of foods in your meals.

Here are some key components of a balanced diet:

  • Carbohydrates: Provide energy for your rides. Include whole grains, fruits, and vegetables.
  • Proteins: Help in muscle recovery and growth. Add lean meats, beans, and nuts.
  • Fats: Essential for long-lasting energy. Choose healthy fats like avocados and olive oil.
  • Vitamins and Minerals: Support overall health. Eat a variety of colorful fruits and vegetables.
Nutrient Food Sources Benefits
Carbohydrates Whole grains, Fruits, Vegetables Energy supply
Proteins Lean meats, Beans, Nuts Muscle recovery
Fats Avocados, Olive oil Long-lasting energy
Vitamins & Minerals Fruits, Vegetables Overall health

Staying Hydrated

Staying hydrated is just as important as eating right. Water helps regulate your body temperature and keeps you alert.

  1. Drink water before, during, and after your rides.
  2. For long rides, consider sports drinks to replenish electrolytes.
  3. Monitor your urine color; light yellow indicates good hydration.

A simple hydration strategy can include:

  • Drink 16-20 ounces of water 2 hours before riding.
  • Consume 8 ounces of water every 15-20 minutes during your ride.
  • After your ride, drink 16-24 ounces of water for every pound lost.

Remember, proper nutrition and hydration can make a huge difference. They help you ride longer and recover faster.

Recovery And Rest

Becoming a good cyclist takes time, training, and dedication. One often overlooked aspect is recovery and rest. Without proper rest, even the best training plans fail.

Importance Of Rest

Rest is crucial for muscle repair and growth. Hard training creates tiny tears in muscle fibers. Rest allows these tears to heal stronger. Skipping rest can lead to overtraining, injury, and burnout.

Rest days improve performance and prevent fatigue. They give your body the chance to recover energy stores. Proper rest ensures you feel fresh and strong for your next ride.

Recovery Techniques

Several techniques help speed up recovery. Below are some effective methods:

  • Stretching: Helps improve flexibility and reduce muscle tightness.
  • Massage: Eases muscle soreness and improves circulation.
  • Hydration: Keeps muscles hydrated and aids in nutrient transport.
  • Nutrition: Consuming protein and carbs helps muscle repair and energy replenishment.
  • Sleep: Essential for overall recovery and mental health.
Technique Benefits
Stretching Improves flexibility, reduces tightness
Massage Eases soreness, improves circulation
Hydration Keeps muscles hydrated
Nutrition Helps muscle repair, energy replenishment
Sleep Essential for recovery, mental health

Use these techniques regularly for optimal recovery. Incorporate them into your training plan to become a stronger cyclist.

Overcoming Challenges

Becoming a good cyclist involves facing and overcoming various challenges. These can test your commitment, but persistence pays off. Below, we discuss common obstacles and tips to stay motivated.

Common Obstacles

Cyclists often encounter several common obstacles. Knowing what to expect can help you prepare and stay the course.

  • Weather conditions: Rain, wind, and extreme temperatures can be tough.
  • Injuries: Falls and muscle strain can slow progress.
  • Time management: Balancing training with daily life can be hard.
  • Fatigue: Long rides and intense training can be tiring.

Staying Motivated

Staying motivated is key to becoming a good cyclist. Here are some tips to keep you going.

  1. Set clear goals: Know what you want to achieve.
  2. Track progress: Keep a journal or use an app.
  3. Join a group: Cycling with others can be inspiring.
  4. Celebrate small wins: Every milestone counts.
Challenge Tip to Overcome
Weather conditions Dress appropriately and plan routes.
Injuries Always warm up and listen to your body.
Time management Schedule your rides in advance.
Fatigue Get enough rest and hydrate well.

Expert Tips And Advice

Becoming a good cyclist takes time, practice, and dedication. To help you on this journey, we've gathered some expert tips and advice. These insights will keep you motivated and improve your cycling skills.

Pro Cyclist Insights

Professional cyclists have valuable tips for beginners. Here are some key points:

  • Consistency: Ride regularly to build stamina.
  • Rest: Allow your body to recover.
  • Nutrition: Eat a balanced diet for energy.
  • Hydration: Drink plenty of water before, during, and after rides.
  • Technique: Focus on proper riding posture.

Avoiding Injuries

Staying injury-free is crucial for continuous progress. Follow these tips:

Tip Description
Warm-Up Always start with a 10-minute warm-up.
Stretch Stretch muscles before and after cycling.
Proper Gear Wear the right helmet and padded shorts.
Listen to Your Body Rest if you feel pain or discomfort.
How Long Does It Take To Become A Good Cyclist: Expert Tips

Credit: m.youtube.com

Tracking Progress

Tracking your progress as a cyclist is essential for improvement. It helps you see how far you've come and where you can improve. This section focuses on how you can track your cycling progress effectively.

Using Technology

Technology can be a great aid in tracking your cycling progress. Many apps and gadgets are available to help you. Here are some popular tools:

  • Strava: Tracks your rides and compares them with others.
  • Garmin: Provides detailed data on your performance.
  • Zwift: Makes indoor training fun and interactive.

These tools can monitor your distance, speed, and elevation. They also offer insights into your heart rate and calories burned. This data can help you set realistic goals and achieve them.

Celebrating Milestones

Celebrate your achievements to stay motivated. Here are some ways to do that:

  1. Set small, achievable goals.
  2. Track your progress towards these goals.
  3. Reward yourself when you reach a milestone.

Rewards can be simple, like a favorite snack or a rest day. Celebrating helps you stay positive and focused on your cycling journey.

Frequently Asked Questions

How Long To Become A Proficient Cyclist?

Becoming a proficient cyclist typically takes 6 months to a year. Consistent practice and training are key. Your progress may vary based on your dedication and fitness level.

What Training Is Needed To Become A Good Cyclist?

To become a good cyclist, focus on endurance, strength, and technique. Mix long rides, interval training, and cross-training for balanced improvement. Regular practice is essential.

How Often Should I Cycle To Improve?

To see improvement, cycle at least 3-4 times per week. Consistency is crucial. Gradually increase your distance and intensity for better results.

Can Beginners Become Good Cyclists Quickly?

Beginners can become good cyclists within a few months. Dedication, regular practice, and proper training are vital. Start slowly and build up your endurance.

Conclusion

Becoming a good cyclist takes time, dedication, and consistent practice. Everyone's journey is unique, so be patient. Focus on gradual improvement, proper training, and enjoying the ride. Remember, persistence and passion are key. Soon, you'll see significant progress and enjoy the many benefits of cycling.

Keep pedaling towards your goals!

Saturday, 12 October 2024

Bluefin Cruise Carbon: The Ultimate Stand-Up Paddleboard Guide

The Bluefin Cruise Carbon is a high-performance inflatable paddleboard. It offers stability, durability, and top-notch features for paddlers.

Bluefin Cruise Carbon stands out as a premium inflatable paddleboard designed for serious paddlers. Its dual-layer PVC construction ensures unmatched durability and rigidity. The carbon rail enhances performance and stability, making it perfect for various water conditions. This paddleboard includes essential accessories like a fiberglass paddle, double-action pump, and carry bag, ensuring a complete package for enthusiasts.

Users appreciate its lightweight design, making it easy to transport and store. Perfect for both beginners and experienced paddlers, Bluefin Cruise Carbon delivers a superior paddling experience. Its sleek design and advanced features make it a top choice in the market.

Bluefin Cruise Carbon: The Ultimate Stand-Up Paddleboard Guide

Credit: bluefinsupboards.eu

Introduction To Bluefin Cruise Carbon

The Bluefin Cruise Carbon is a top-tier paddleboard designed for enthusiasts. Its advanced features and robust construction offer an unparalleled experience on the water. This paddleboard stands out due to its unique blend of performance and durability.

What Makes It Unique

The Bluefin Cruise Carbon features a carbon fiber rail for extra rigidity. This improves stability and performance. The paddleboard also includes a dual-chamber inflation system. This ensures maximum buoyancy and safety.

Another unique feature is its US Box Fin System. This offers better tracking and maneuverability. The board's surface has a crocodile skin texture. This provides excellent grip and comfort.

Target Audience

The Bluefin Cruise Carbon is perfect for both beginners and experts. Beginners will appreciate its stability and ease of use. Experts will enjoy its advanced features and performance.

It is also ideal for fitness enthusiasts. The board is great for yoga and other exercises on water. Families will find it suitable for recreational activities. It is a versatile and reliable paddleboard for all skill levels.

Bluefin Cruise Carbon: The Ultimate Stand-Up Paddleboard Guide

Credit: www.inflatableboarder.com

Design And Build Quality

The Bluefin Cruise Carbon sets itself apart with its remarkable design and build quality. This paddleboard combines aesthetic appeal with superior durability. Let's explore the materials and construction techniques that make it stand out.

Materials Used

The Bluefin Cruise Carbon uses high-quality materials. The deck is constructed from military-grade PVC. This ensures the board can withstand tough conditions.

The board also features a carbon fiber rail. This provides extra strength and rigidity. The carbon rail enhances performance and durability. The EVA deck pad offers a comfortable grip. It is also resistant to wear and tear.

Material Purpose
Military-Grade PVC Durability and Toughness
Carbon Fiber Rail Strength and Rigidity
EVA Deck Pad Comfort and Grip

Construction Techniques

The construction of the Bluefin Cruise Carbon uses advanced techniques. The board employs a dual-layer fusion technology. This method bonds two layers of PVC without glue. This makes the board lighter and stronger.

The carbon fiber rail is integrated using a precision molding process. This ensures a seamless finish and optimal performance. The drop-stitch core provides excellent rigidity. This technique locks the fibers in place for a firm structure.

  • Dual-Layer Fusion Technology
  • Precision Molding Process
  • Drop-Stitch Core

Performance On Water

The Bluefin Cruise Carbon is an exceptional paddleboard. Its performance on water is impressive, ensuring a smooth and enjoyable ride. Let's dive into its key attributes.

Stability And Balance

The Bluefin Cruise Carbon offers outstanding stability and balance. The wide deck provides a firm standing area. This makes it easier to maintain balance. Beginners and experts alike will appreciate its design.

The board features an advanced rail system. This system further enhances stability. Even in choppy waters, the board stays steady. This ensures a safe and enjoyable experience for all paddlers.

Speed And Maneuverability

Speed is another significant feature of the Bluefin Cruise Carbon. The board's streamlined shape reduces water resistance. This allows for faster gliding on water. The carbon fiber construction also adds to its speed.

Maneuverability is equally impressive. The Bluefin Cruise Carbon responds quickly to paddler input. This makes it easy to navigate through tight spots. The tri-fin setup enhances this feature, providing better control.

Below is a summary table of its performance features:

Feature Description
Stability Wide deck and advanced rail system
Speed Streamlined shape and carbon fiber construction
Maneuverability Quick response and tri-fin setup

In summary, the Bluefin Cruise Carbon excels in performance on water. Its stability, speed, and maneuverability make it a top choice.

Features And Accessories

The Bluefin Cruise Carbon paddleboard is loaded with exceptional features and accessories. This makes it a top choice for water enthusiasts. Discover what sets this board apart in the sections below.

Included Gear

Every Bluefin Cruise Carbon paddleboard comes with a host of included gear. This ensures a comprehensive water adventure experience.

  • Adjustable Paddle: A durable, lightweight paddle that suits all heights.
  • Dual-Action Pump: Inflate your board quickly and effortlessly.
  • Coiled Leash: Keeps your board secure in case you fall off.
  • Kayak Seat Kit: Easily convert your paddleboard into a kayak.
  • Backpack: A spacious and comfortable backpack for easy transportation.
  • Repair Kit: Essential tools for on-the-go repairs.

Optional Add-ons

The Bluefin Cruise Carbon offers a variety of optional add-ons to enhance your paddleboarding experience.

  • Electric Pump: Inflate your board even faster with minimal effort.
  • Carbon Fiber Paddle: A lighter and stronger alternative to the standard paddle.
  • GoPro Mount: Capture your adventures with ease.
  • Extra Fins: Customize your board's performance with additional fins.
  • Waterproof Phone Case: Protect your phone while out on the water.

The Bluefin Cruise Carbon is not just a paddleboard. It's a complete package. Whether you are a beginner or a pro, these features and accessories will elevate your experience.

User Experience

The user experience of the Bluefin Cruise Carbon is outstanding. This paddleboard offers comfort and ease of use, making it a favorite among enthusiasts.

Comfort And Usability

The Bluefin Cruise Carbon excels in comfort and usability. Its design ensures long hours of paddling without discomfort. The deck pad is cushioned, providing a soft yet firm grip for your feet.

The board's stability is another key feature. It remains steady on both calm and choppy waters. This makes it suitable for paddlers of all skill levels.

Setting up the board is a breeze. The package includes an easy-to-use pump and clear instructions. You can go from unpacking to paddling in no time.

Real-life Testimonials

Many users rave about the Bluefin Cruise Carbon. Here are some real-life testimonials:

User Testimonial
Jane D. "The board is incredibly stable and easy to maneuver."
John S. "I love the comfort of the deck pad. My feet never get tired."
Emily R. "Setup is quick and easy. I was on the water in minutes."

These testimonials highlight the board's key features. Stability, comfort, and ease of setup are frequently mentioned. Users appreciate the quality and performance of the Bluefin Cruise Carbon.

In summary, the Bluefin Cruise Carbon offers an exceptional user experience. Its comfort and usability make it stand out in the paddleboard market.

Bluefin Cruise Carbon: The Ultimate Stand-Up Paddleboard Guide

Credit: www.supboardguide.com

Maintenance And Care

Taking good care of your Bluefin Cruise Carbon ensures its longevity. Proper maintenance keeps it in top shape for every adventure. Below are some essential tips and tricks to help you maintain and care for your paddleboard.

Cleaning Tips

Regular cleaning is crucial to keep your Bluefin Cruise Carbon looking new. Follow these simple steps:

  • Rinse the board with fresh water after each use.
  • Use a mild soap and soft brush for deeper cleaning.
  • Dry the board thoroughly to prevent mold and mildew.

Storage Solutions

Proper storage extends the life of your Bluefin Cruise Carbon. Here are some storage solutions:

Storage Method Details
Indoor Storage Store in a cool, dry place. Avoid direct sunlight.
Outdoor Storage Use a protective cover. Keep off the ground.
Deflated Storage Roll the board loosely. Avoid sharp folds.

Follow these tips to keep your board in the best condition. Happy paddling!

Comparing Competitors

The Bluefin Cruise Carbon stands out in the paddleboard market. But how does it compare to other brands? Let’s dive into the differences, pros, and cons.

Key Differences

Several features make the Bluefin Cruise Carbon unique:

  • Material: It uses high-quality carbon fiber.
  • Stability: The board offers excellent balance and control.
  • Weight: It is lightweight yet durable.
  • Accessories: Comes with a full kit, including a pump and paddle.

Other brands may use different materials or offer fewer accessories.

Pros And Cons

Here’s a quick look at the pros and cons of the Bluefin Cruise Carbon:

Pros Cons
  • High-quality carbon fiber
  • Excellent stability
  • Lightweight
  • Complete accessory kit
  • Higher price
  • Limited color options

Other brands might offer lower prices or more color choices. But they often lack the quality and accessories of the Bluefin Cruise Carbon.

Buying Guide

Welcome to the ultimate buying guide for the Bluefin Cruise Carbon. This guide will help you make an informed decision. Find out where to buy, pricing, and value.

Where To Purchase

You can buy the Bluefin Cruise Carbon from various sources. Here are some options:

  • Official Website: Buy directly from the Bluefin website for the best deals.
  • Amazon: Available with customer reviews and fast shipping.
  • Sporting Goods Stores: Check local stores for in-person purchase.
  • Specialized Online Retailers: Sites like REI and Dick's Sporting Goods offer it.

Pricing And Value

The Bluefin Cruise Carbon is a high-value investment. Here's a breakdown of its pricing and value:

Store Price Additional Benefits
Bluefin Official Website $849 Free shipping, 5-year warranty
Amazon $899 Customer reviews, fast shipping
REI $879 Member discounts, in-store support
Dick's Sporting Goods $899 In-store pickup, loyalty points

Consider the additional benefits when comparing prices. The warranty and customer support are crucial.

Evaluate based on your personal needs and budget. The Bluefin Cruise Carbon offers great value for its price.

Conclusion And Final Thoughts

The Bluefin Cruise Carbon paddleboard is an excellent choice for water enthusiasts. Its design, durability, and performance set it apart from competitors.

Summary Of Benefits

  • Durable Construction: The board features carbon fiber rails.
  • Stability: The wide deck ensures a stable ride.
  • Performance: Enhanced tracking and speed make it ideal for all skill levels.
  • Accessories: Comes with a complete kit including paddle, pump, and backpack.

Final Recommendations

Feature Recommendation
Beginners Excellent due to stability and ease of use.
Intermediate Paddlers Great for improving skills and exploring new waters.
Advanced Users Perfect for high performance and long-distance paddling.

The Bluefin Cruise Carbon stands out for its superior build quality. The carbon fiber rails add to its durability. Its wide deck offers stability, making it suitable for all skill levels. Complete with a paddle, pump, and backpack, it provides everything needed for a great paddling experience.

Frequently Asked Questions

What Is The Bluefin Cruise Carbon?

The Bluefin Cruise Carbon is a high-performance inflatable paddleboard. It is designed for stability and speed. Ideal for both beginners and pros.

How Durable Is The Bluefin Cruise Carbon?

The Bluefin Cruise Carbon is extremely durable. It features a reinforced carbon rail. This offers extra stiffness and longevity.

Can Beginners Use The Bluefin Cruise Carbon?

Yes, beginners can use the Bluefin Cruise Carbon. Its stable design makes it ideal for new paddlers. It also offers excellent balance and control.

What Accessories Come With The Bluefin Cruise Carbon?

The Bluefin Cruise Carbon comes with various accessories. These include a paddle, pump, and backpack. It also includes a leash and repair kit.

Conclusion

The Bluefin Cruise Carbon offers exceptional durability and performance. It’s perfect for both beginners and seasoned paddlers. Its lightweight design ensures easy maneuverability. Investing in this paddleboard guarantees countless enjoyable water adventures. Choose the Bluefin Cruise Carbon for your next aquatic journey and experience unmatched quality and reliability.

Friday, 11 October 2024

How To Put A Bicycle Seat Back Together: Step-by-Step Guide

To reassemble a bicycle seat, align the seat post and clamp, then secure with bolts. Ensure everything is tightly fastened.

A properly assembled bicycle seat enhances comfort and safety. First, gather all necessary tools, including a wrench and screwdrivers. Position the seat post into the bike frame, ensuring it's at your preferred height. Attach the seat to the post, aligning the rails with the clamp.

Secure the bolts, tightening them evenly to avoid misalignment. Test the seat for stability by pressing down and ensuring it doesn’t move. This process is straightforward and can be done in a few minutes, making your ride more enjoyable and secure. Regular maintenance of the seat ensures a comfortable and safe cycling experience.

Gathering Necessary Tools

Before putting a bicycle seat back together, gather the right tools. Having the necessary tools ensures a smooth and successful process. This section provides a checklist of essential tools and some optional ones for added comfort.

Essential Tools Checklist

  • Allen Wrenches: Typically, 4mm, 5mm, or 6mm sizes.
  • Screwdrivers: Both Phillips and flathead types.
  • Adjustable Wrench: For tightening nuts and bolts.
  • Grease: To ensure smooth movement and prevent rust.
  • Rag: For cleaning and wiping excess grease.

Optional Tools For Comfort

  • Torque Wrench: Ensures bolts are tightened to the correct torque.
  • Seat Cover: Adds extra padding for a more comfortable ride.
  • Level: Helps to ensure the seat is perfectly horizontal.
  • Lubricant Spray: Keeps moving parts smooth and rust-free.

Removing The Old Seat

Before installing a new bicycle seat, you need to remove the old one. This process involves a few simple steps. It’s essential to follow them carefully to avoid damaging your bike.

Loosening The Seat Clamp

The first step is to loosen the seat clamp. The seat clamp holds the seat to the seat post. You will need an Allen wrench or a spanner. Locate the bolt or nut on the seat clamp. Turn it counterclockwise to loosen it.

Make sure to hold the seat steady. This prevents it from falling off suddenly. Keep turning until the seat moves freely. It should no longer be attached tightly to the post.

Detaching The Seat Post

Once the seat clamp is loose, it’s time to detach the seat post. Grip the seat firmly with both hands. Pull it upwards to remove it from the frame.

Sometimes, the seat post may be stuck. In such cases, apply a bit of lubricating oil. Let it sit for a few minutes. Then, try pulling it out again.

After removing the seat post, clean the area. Use a cloth to wipe away dirt or grease. This ensures a smooth installation of the new seat.

Preparing The New Seat

Before you can enjoy your ride, you must install the new seat. Follow these steps to ensure a secure and comfortable fit.

Inspecting The New Seat

First, examine the new seat. Look for any visible damage. Check the padding for comfort. Ensure the rails are straight and not bent. A damaged seat can affect your ride. Inspecting the seat saves time and future hassle.

Inspection Checklist
Check for visible damage
Ensure padding is intact
Verify rails are straight

Aligning The Rails

Next, align the rails with the seat post. Position the seat so the rails fit into the clamps. Ensure the seat is centered. This step is important for balanced riding. A misaligned seat can cause discomfort and poor performance.

  1. Position the seat above the seat post.
  2. Align the rails with the clamps.
  3. Ensure the seat is centered.

Tighten the clamps. Use a wrench if needed. Double-check the alignment. Make sure the seat is level. A well-aligned seat provides comfort and stability.

How To Put A Bicycle Seat Back Together: Step-by-Step Guide

Credit: m.youtube.com

Installing The Seat Post

Installing the seat post is a crucial step in reassembling your bicycle seat. This section will guide you through the process. You'll learn how to insert the seat post and adjust the height for a comfortable ride.

Inserting The Seat Post

First, ensure the seat post is clean. Dirt and grime can damage it. Apply a thin layer of grease to the post. This will make it easier to insert and prevent rust.

  • Locate the seat tube on your bike frame.
  • Slide the seat post into the seat tube.
  • Make sure it is straight and secure.

Adjusting The Height

Finding the right seat height is important for comfort and efficiency. Follow these steps to adjust the height:

  1. Sit on the bike and place your heel on the pedal.
  2. The pedal should be at its lowest point.
  3. Your leg should be straight with your heel on the pedal.

If your leg is bent, the seat is too low. Raise it a bit and try again. If your heel can't reach, lower the seat.

Once you find the right height, tighten the clamp. Ensure it is secure to prevent the seat from moving.

Securing The Seat

Securing the seat on your bicycle is crucial. A well-secured seat ensures comfort and safety. Follow these steps to secure your bicycle seat properly.

Positioning The Seat

First, position the seat. Ensure it is level. A level seat enhances comfort. Adjust the seat height. Align the seat with the bike frame. This alignment helps with balance.

Tightening The Seat Clamp

Next, tighten the seat clamp. A loose clamp can cause the seat to move. Use a wrench to tighten the clamp. Ensure the clamp is secure but not overtightened. Check the seat's stability. It should not wobble or move.

Here is a quick checklist for tightening the seat clamp:

  • Check the clamp's condition.
  • Position the seat correctly.
  • Use the correct wrench size.
  • Tighten the clamp securely.
  • Test the seat's stability.

Following these steps ensures a secure bicycle seat. A secure seat provides a more enjoyable ride.

How To Put A Bicycle Seat Back Together: Step-by-Step Guide

Credit: www.bicycleseats.com

Adjusting Seat Angle

Adjusting the seat angle is key to a comfortable ride. The wrong angle can cause discomfort and affect your cycling experience. Follow these steps to find the perfect angle for your bike seat.

Finding The Right Angle

Start by loosening the seat clamp. This allows you to adjust the seat angle. Use a wrench or Allen key for this task. Adjust the seat until it’s level with the ground. A level seat is a good starting point.

Next, sit on your bike. Check if the seat feels level. If it tilts forward or backward, adjust it again. A proper angle helps you sit comfortably. Ensure the seat is not too high or too low.

Step Action
1 Loosen the seat clamp
2 Adjust the seat to level
3 Sit and check the angle
4 Re-adjust if necessary

Testing For Comfort

After finding the right angle, test the seat for comfort. Take a short ride. Pay attention to how you feel. Is there any discomfort?

Make small adjustments to the angle if needed. A slight tilt forward can reduce pressure. A slight tilt backward can provide more support.

  • Ride for a few minutes
  • Stop and adjust if needed
  • Repeat until comfortable

Ensure the seat angle suits your riding style. Comfort is key for long rides. A well-adjusted seat can prevent pain and improve performance.

Final Checks

You've reassembled your bicycle seat and it's almost ready to go. But before you hit the road, it's crucial to perform final checks. These ensure your seat is secure and comfortable. Let's dive into the essential steps.

Ensuring Stability

First, ensure your bicycle seat is stable. Hold the seat and give it a firm shake. If it wobbles, it needs further tightening. Use a wrench to adjust the bolts. Repeat the shake test until the seat is stable.

Next, sit on the seat. Check for any movement or discomfort. If the seat shifts, tighten the bolts again. Stability is key for a safe ride.

Making Minor Adjustments

Now, focus on minor adjustments. Check the seat angle. A level seat ensures comfort. Use a spirit level to check. Adjust the angle using the seat clamp. Tighten the clamp once the seat is level.

Next, check the seat height. Stand beside your bike. The seat should be level with your hips. Adjust the height by loosening the seat post clamp. Raise or lower the seat as needed. Tighten the clamp once the height is correct.

Follow these steps to ensure your bicycle seat is secure and comfortable. Happy riding!

Maintenance Tips

Regular maintenance ensures your bicycle seat stays in top condition. This helps with comfort and safety during your rides. Below are some key maintenance tips to keep your bicycle seat in good shape.

Regular Inspections

Regularly inspect your bicycle seat for any signs of wear or damage. Check the bolts and screws to ensure they are tight. A loose seat can be dangerous. Look for cracks or tears in the seat cover. Replace the seat if you find any major damage.

Lubrication Advice

Lubrication is important for the moving parts of your bicycle seat. Use a good-quality lubricant on the seat post. This helps to prevent rust and makes adjustments easier. Here is a simple guide:

  1. Clean the seat post with a dry cloth.
  2. Apply a small amount of lubricant to the post.
  3. Wipe off any excess lubricant.

Lubricate the seat clamp if it has moving parts. Use a few drops of oil to keep it functioning smoothly. Always check the manufacturer's recommendations for the best type of lubricant.

Remember, regular inspections and proper lubrication can extend the life of your bicycle seat. This ensures a more comfortable and safer ride every time.

How To Put A Bicycle Seat Back Together: Step-by-Step Guide

Credit: www.wikihow.com

Frequently Asked Questions

How Do I Reattach A Bicycle Seat?

To reattach a bicycle seat, align it with the seat post. Tighten the bolts securely. Ensure it's level and stable.

What Tools Are Needed To Fix A Bike Seat?

You'll need an Allen wrench or a multi-tool. These tools help tighten the seat clamp and adjust the seat.

How Do I Adjust The Seat Height?

Loosen the seat post clamp. Adjust the seat to the desired height. Tighten the clamp securely.

Can I Replace A Damaged Bike Seat Myself?

Yes, you can. Remove the old seat, align the new one, and tighten the bolts securely.

Conclusion

Reassembling a bicycle seat is a simple process with the right steps. Follow the instructions carefully for success. Regular maintenance ensures a comfortable and safe ride. Always check for tightness and alignment before each ride. Enjoy the satisfaction of a job well done and a smoother cycling experience.

Kmc X10 10 Speed Chain: Ultimate Performance for Cyclists

The KMC X10 10 Speed Chain is a durable, lightweight chain designed for smooth shifting and long-lasting performan...