Tuesday, 3 December 2024

Mountain Bike Weight Limit: Essential Guide for Safe Riding

Mountain bike weight limits typically range from 250 to 300 pounds. This includes both the rider and any gear carried.

Mountain biking is a thrilling sport that demands reliable equipment. Knowing the weight limit of a mountain bike is crucial for safety and performance. Overloading a bike can lead to structural damage and potential injuries. Manufacturers specify weight limits to ensure optimal functionality and longevity.

Riders must consider both their body weight and the weight of any additional gear. Choosing a bike that suits your weight ensures a smooth and safe riding experience. Always check the manufacturer's guidelines and consult with experts if needed. This helps in making an informed decision and enjoying your mountain biking adventures to the fullest.

Mountain Bike Weight Limit: Essential Guide for Safe Riding

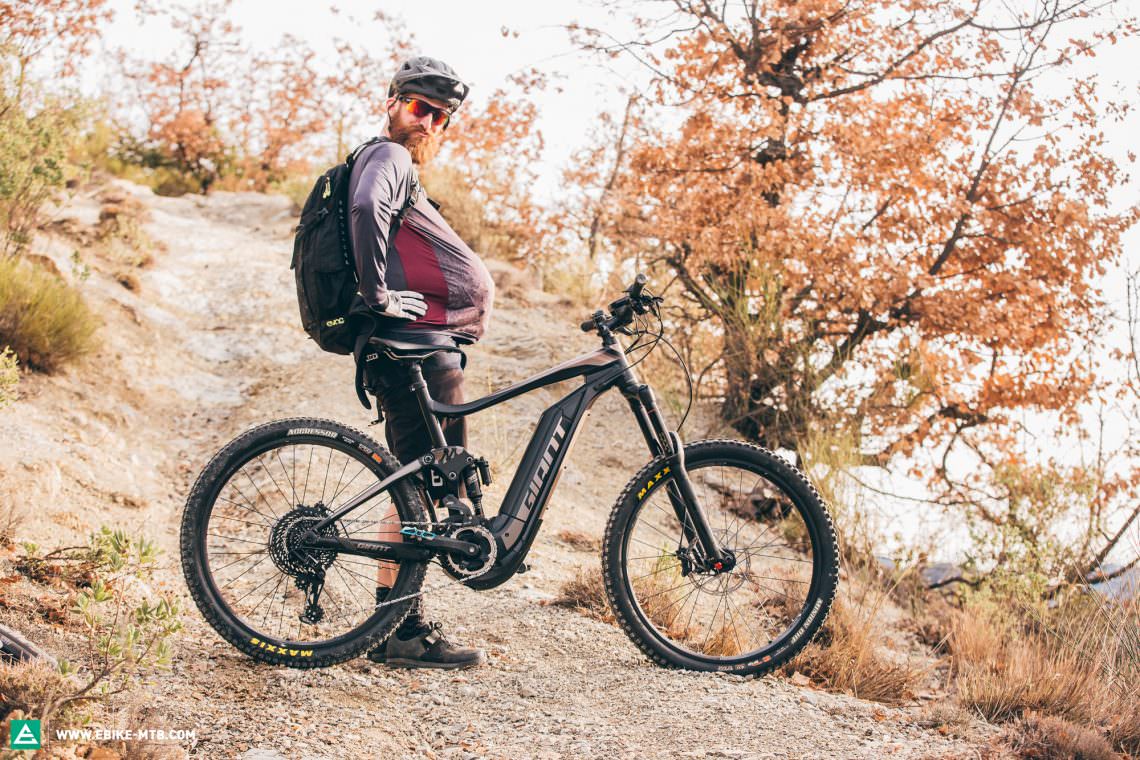
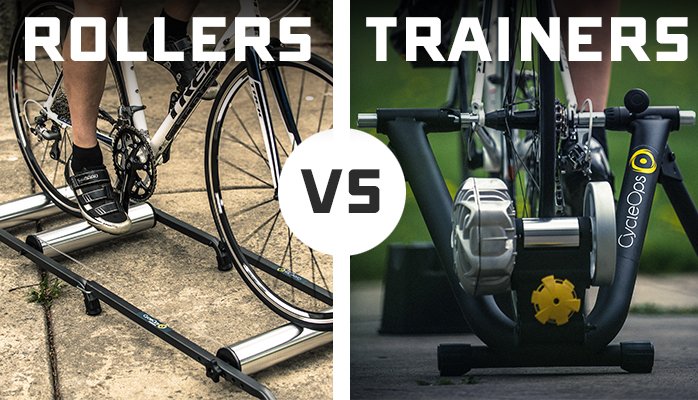
Credit: ebike-mtb.com

Importance Of Weight Limit

The weight limit of a mountain bike plays a crucial role. It affects both safety and performance. Ignoring the weight limit can lead to serious issues. Understanding its importance helps you make informed decisions.

Safety Concerns

Exceeding the weight limit can be dangerous. The bike's frame may not support extra weight. This can cause frame cracks or even breaks. Safety is the top priority for any rider.

Here are some potential safety risks:

  • Frame cracking or breaking
  • Wheel deformation or failure
  • Braking system inefficiency
  • Increased risk of accidents

Bike Performance

Weight limit affects your bike's performance. A bike within its weight limit works efficiently. It ensures smooth rides and better control.

Key performance areas impacted by weight limit include:

Performance Area Impact of Exceeding Weight Limit
Speed Reduced speed due to extra load
Control Difficulty in handling the bike
Suspension Increased wear and tear
Durability Shortened lifespan of components

Maintaining the recommended weight limit is crucial. It ensures your bike performs at its best.

Factors Affecting Weight Limit

Understanding the factors affecting a mountain bike's weight limit is crucial. It helps riders choose the right bike for their needs. Two main factors impact this: frame material and component strength.

Frame Material

The frame material plays a huge role in the bike's weight limit. Different materials offer varying levels of strength and flexibility.

Material Weight Limit (lbs) Characteristics
Aluminum 250-300 Lightweight, affordable, common
Steel 300-350 Durable, heavy, absorbs shocks
Carbon Fiber 250-300 Light, stiff, expensive
Titanium 300-350 Strong, light, costly

Component Strength

Besides the frame, other components also affect the bike's weight limit. These include wheels, forks, and handlebars.

  • Wheels: Must support the rider's weight and stress during rides.
  • Forks: Need to be strong enough to handle rough terrains.
  • Handlebars: Should be sturdy to provide control and stability.

Each component's strength contributes to the overall durability of the bike. Ensuring each part is robust helps maintain the bike's weight limit.

Determining Your Bike's Weight Limit

Mountain bikes are designed for rugged terrains and adventurous rides. Ensuring your bike can handle your weight is crucial. Riding a bike that exceeds its weight limit can lead to safety issues and faster wear and tear. This section will help you understand how to determine your bike's weight limit effectively.

Manufacturer Specifications

Each mountain bike comes with a set of manufacturer specifications. These specifications include the bike's weight limit. You can usually find this information in the user manual or on the manufacturer's website. It is essential to adhere to these guidelines to ensure your safety and the longevity of your bike.

Here's how to find your bike's weight limit:

  • Check the user manual for weight guidelines.
  • Visit the manufacturer's official website.
  • Look for stickers or labels on the bike frame.

Consulting Experts

If you are unsure about your bike's weight limit, consulting experts can be helpful. Bike shop professionals and experienced cyclists can provide valuable insights. They can help you understand the limitations and suggest suitable upgrades if needed.

Here are some ways to consult experts:

  1. Visit a local bike shop for advice.
  2. Join online forums and communities.
  3. Ask experienced friends or fellow cyclists.

By following these steps, you can ensure that your mountain bike is safe and suitable for your adventures.

Impact Of Exceeding Weight Limit

Understanding the impact of exceeding the weight limit on a mountain bike is crucial. This ensures both the longevity of your bike and your safety. Exceeding the weight limit can lead to several issues that affect your biking experience.

Potential Damage

Exceeding the weight limit can cause significant damage to your bike. The frame might bend or break. The tires can wear out quickly. The suspension system may fail. These damages can be costly to repair.

Here's a table summarizing the potential damages:

Component Possible Damage
Frame Bending or breaking
Tires Quick wear and tear
Suspension Failure

Rider Safety

Exceeding the weight limit compromises rider safety. The bike may not handle well. This can lead to accidents. The brakes might not work effectively under extra weight. This increases the risk of crashes.

Consider these safety risks:

  • Poor bike handling
  • Increased risk of accidents
  • Ineffective brakes

Always check the weight limit of your mountain bike. Stay within the recommended range. This ensures your bike lasts longer and keeps you safe.

Choosing The Right Bike

Choosing the right mountain bike is crucial for a safe and enjoyable ride. One key factor is the bike's weight limit. This ensures the bike can handle your weight and gear. Let's explore important considerations.

Weight Capacity

Mountain bikes have different weight capacities. This is how much weight a bike can support safely. Check the manufacturer's specifications for weight limits.

Bike Type Weight Capacity (lbs)
Standard Mountain Bike 250
Heavy-Duty Mountain Bike 300
Specialized Mountain Bike 350

Always choose a bike with a weight limit higher than your total weight. This includes your body weight and any gear you carry.

Riding Style

Your riding style affects the type of bike you need. Different styles put varying stresses on the bike.

  • Cross-Country: Light and fast, ideal for smooth trails.
  • Trail Riding: Versatile, for a mix of terrain and conditions.
  • Downhill: Built for speed and rough terrains, offers more durability.

Consider your primary riding style to choose the right bike. Each style has specific features designed for different stresses and terrain types.

Mountain Bike Weight Limit: Essential Guide for Safe Riding

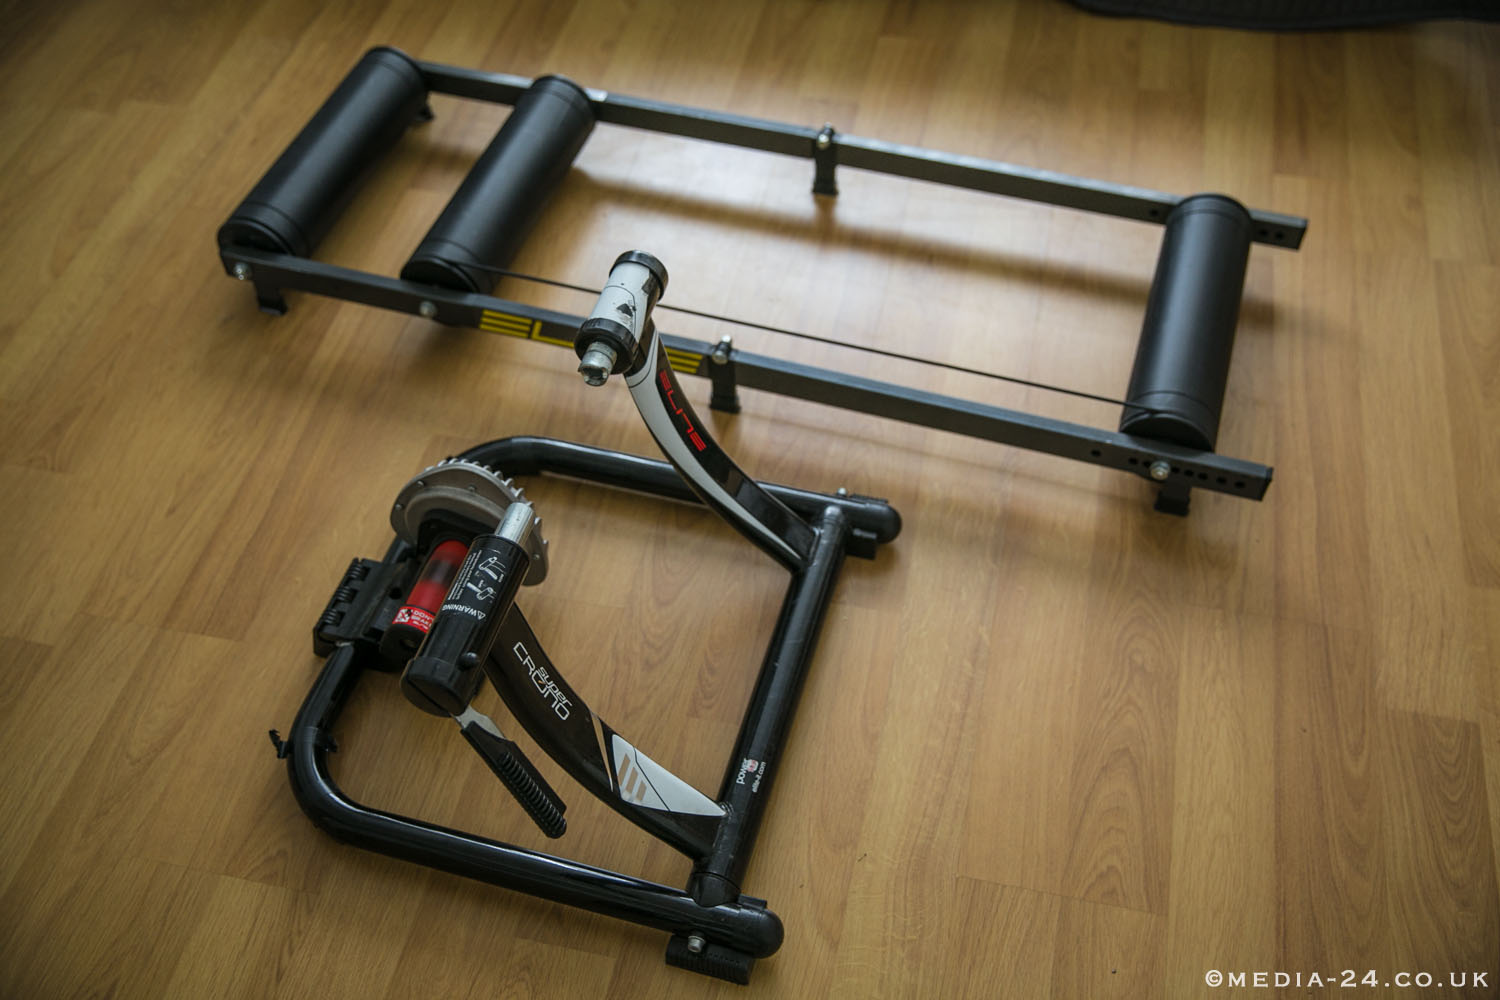
Credit: bicycles.stackexchange.com

Maintenance Tips

Maintaining your mountain bike is key to ensuring it operates efficiently. Regular maintenance helps prevent damage and prolongs the bike's life. Here are some essential tips to keep your bike in top shape.

Regular Inspections

Regular inspections are crucial for keeping your mountain bike in good condition. Inspect the frame for any cracks or dents. Check the tires for wear and ensure they are properly inflated. Examine the brakes for responsiveness and make sure the brake pads are not worn out.

  • Frame: Look for cracks or dents.
  • Tires: Ensure proper inflation and check for wear.
  • Brakes: Check responsiveness and brake pads.

Component Upgrades

Upgrading components can significantly improve your bike's performance and weight capacity. Consider upgrading to lighter, more durable materials. Carbon fiber frames, for example, are both strong and lightweight. Also, look at upgrading your wheels and suspension system.

Component Upgrade Option
Frame Carbon fiber
Wheels Lightweight alloys
Suspension Advanced shock absorbers

Upgrading to these components can help improve your bike's longevity and performance.

Custom Solutions

Mountain biking is an exhilarating sport. Riders often need custom solutions. These solutions cater to specific needs like weight limits. Custom solutions ensure safety and performance.

Reinforced Frames

Reinforced frames are a key custom solution. They are designed to handle extra weight. Standard frames may not suffice. Reinforced frames provide added strength. This prevents damage and ensures durability.

Feature Standard Frame Reinforced Frame
Weight Limit 250 lbs 350 lbs
Material Aluminum Steel
Durability Moderate High

Heavy-duty Components

Heavy-duty components are crucial for custom mountain bikes. They include stronger wheels and thicker tires. These components handle rough terrain better. They also support higher weight limits.

  • Wheels: Reinforced spokes and rims.
  • Tires: Thicker treads for better grip.
  • Brakes: High-performance disc brakes.

Heavy-duty components ensure a smoother ride. They reduce wear and tear. This makes the bike last longer.

Mountain Bike Weight Limit: Essential Guide for Safe Riding

Credit: www.amazon.com

Tips For Heavier Riders

Mountain Bike Weight Limit: Tips for Heavier Riders

Mountain biking is a thrilling sport for everyone. Heavier riders can enjoy it too. Here are some tips to ensure a safe and enjoyable ride.

Proper Technique

Using the right technique helps you maintain control. Balance is key. Keep your weight centered over the bike. This will prevent falls and improve stability.

Braking is another crucial aspect. Use both brakes to stop smoothly. Sudden stops can cause accidents. Practice braking to gain confidence.

Pedaling efficiently makes a huge difference. Push down on the pedals with consistent force. This helps you climb hills easily.

Suitable Terrain

Choosing the right terrain is important. Avoid rocky and slippery trails. These can be dangerous for heavier riders.

Gravel paths and dirt trails are ideal. They offer good grip and stability. Grass fields are also a good choice. They provide a softer landing if you fall.

Check the trail's difficulty level. Start with beginner-friendly routes. Gradually move to more challenging trails. This helps build skill and confidence.

Terrain Type Recommended for Heavier Riders
Rocky Trails No
Gravel Paths Yes
Dirt Trails Yes
Grass Fields Yes

Use these tips to enjoy mountain biking safely. Remember to always wear safety gear.

Frequently Asked Questions

What Is The Typical Weight Limit For A Mountain Bike?

Mountain bikes generally support riders up to 300 pounds. However, it's crucial to check the manufacturer's specifications. Weight limits can vary based on the bike's design and materials.

Can A Heavy Rider Use A Mountain Bike?

Yes, heavy riders can use mountain bikes. Many brands design bikes to support higher weights. Always check the bike's weight limit before purchase.

Do Mountain Bike Weight Limits Vary By Brand?

Yes, weight limits can vary by brand. Some brands offer models specifically designed for heavier riders. Always refer to the manufacturer's guidelines.

How Does Weight Affect Mountain Bike Performance?

Exceeding the weight limit can impact performance. It may cause frame damage and affect handling. Always ride within the recommended weight limit for optimal performance.

Conclusion

Choosing the right mountain bike weight limit ensures safety and performance. Always check specifications and consult experts. Prioritize your safety and enjoy a smooth ride. Remember, the right bike makes all the difference. Happy biking!

Monday, 2 December 2024

Thule Bike Rack Wobble: How to Secure Your Ride Effectively

Thule bike racks may wobble due to loose bolts or improper installation. Regular maintenance can prevent this issue.

Thule bike racks are popular for their durability and ease of use. However, users sometimes experience wobbling, which can be concerning. Ensuring the rack is securely installed and checking the bolts regularly can help maintain stability. A secure bike rack not only protects your bike but also enhances safety during transit.

Regular checks and proper installation are essential for a wobble-free experience. Investing time in these simple maintenance steps can provide peace of mind on your biking adventures. Remember to always follow the manufacturer's guidelines for optimal performance and safety.

Thule Bike Rack Wobble: How to Secure Your Ride Effectively

Credit: www.ebay.com

Common Causes Of Bike Rack Wobble

Bike rack wobble can be annoying and dangerous. Understanding the common causes of bike rack wobble can help you fix the problem. This section explores two main reasons for bike rack wobble: loose fastenings and inadequate weight distribution.

Loose Fastenings

Loose fastenings are a major cause of bike rack wobble. Over time, screws and bolts can become loose. This happens due to vibrations from the road. Regularly check all bolts and screws to ensure they are tight. Use a torque wrench for accurate tightening. Follow the manufacturer's specifications for torque settings.

Another common issue is worn-out components. Inspect the fastenings for wear and tear. Replace any damaged parts immediately. This will ensure a secure fit and reduce wobble.

Inadequate Weight Distribution

Improper weight distribution can cause your bike rack to wobble. Ensure that the weight is evenly distributed. Place the heaviest bike closest to the car. This reduces strain on the rack and minimizes wobble.

Check the bike rack's weight limit. Overloading can lead to instability. Always stay within the recommended weight capacity. Use a scale to measure the weight of each bike if needed.

Cause Solution
Loose Fastenings Tighten screws and bolts regularly. Replace worn-out components.
Inadequate Weight Distribution Distribute weight evenly. Place the heaviest bike closest to the car.

Tools And Materials Needed

Fixing a Thule bike rack wobble requires specific tools and materials. The right tools make the job easier and safer. Below, you'll find a detailed list of essential tools and optional add-ons.

Essential Tools

  • Socket Wrench Set: A socket wrench set is crucial for tightening bolts.
  • Allen Wrenches: These are necessary for adjusting the rack’s parts.
  • Torque Wrench: A torque wrench ensures bolts are tightened correctly.
  • Screwdriver: A flathead or Phillips screwdriver helps with minor adjustments.
  • Rubber Mallet: Use a rubber mallet to tap parts into place without damage.

Optional Add-ons

  • Thread Locker: Thread locker keeps bolts from loosening over time.
  • Anti-Rattle Device: This device reduces noise and movement.
  • Protective Gloves: Gloves protect your hands while working.
  • Measuring Tape: Ensure accurate adjustments with a measuring tape.

Below is a quick reference table for the tools and materials:

Tool/Material Purpose
Socket Wrench Set Tightening bolts
Allen Wrenches Adjusting parts
Torque Wrench Ensuring proper tightness
Screwdriver Minor adjustments
Rubber Mallet Tapping parts into place
Thread Locker Preventing bolt loosening
Anti-Rattle Device Reducing noise and movement
Protective Gloves Hand protection
Measuring Tape Accurate adjustments

Proper Installation Techniques

Proper Installation Techniques for Thule Bike Rack Wobble

Installing your Thule bike rack correctly is crucial for a secure ride. Improper installation can cause wobbling, which is dangerous. Follow these steps to ensure your rack is properly installed.

Mounting The Rack

Begin by attaching the rack to your car's hitch. Make sure the hitch is clean and free from debris. Slide the rack into the hitch receiver.

Use the provided bolt to secure the rack. Tighten the bolt with a wrench until it is snug. Check to ensure the rack does not move.

Step Action
1 Clean the hitch
2 Slide the rack into the hitch
3 Secure with the bolt
4 Tighten the bolt

Securing The Bike

Place your bike on the rack's arms. Make sure the bike is centered. Use the straps to secure the bike's frame to the rack.

Check that the straps are tight. The bike should not move. For extra security, use a bungee cord to hold the wheels.

  • Place the bike on the rack
  • Center the bike
  • Use straps to secure the frame
  • Check the straps for tightness
  • Use a bungee cord for added security
Thule Bike Rack Wobble: How to Secure Your Ride Effectively

Credit: www.amazon.sa

Adjusting Fastenings

Ensuring your Thule bike rack is secure is vital. A loose bike rack can be dangerous. Properly adjusting the fastenings helps prevent wobble. Follow these steps for a safe ride.

Tightening Bolts

Start by tightening the bolts. Use a wrench to turn each bolt clockwise. Make sure each bolt is snug. Over-tightening can strip the threads. Check all bolts regularly. A loose bolt can cause wobble.

Using Locking Washers

Locking washers help keep bolts tight. Place a locking washer under each bolt head. This prevents bolts from loosening. Tighten bolts with locking washers in place. Inspect washers for wear.

Step Action
1 Place locking washer under bolt head
2 Tighten bolt with wrench
3 Check tightness regularly

Locking washers are essential for secure fastenings. They reduce wobble. Always use them for a safe and stable bike rack.

Weight Distribution Tips

Ensuring proper weight distribution on your Thule bike rack is essential. It prevents wobble and keeps your bikes safe. Follow these tips for a smoother ride.

Balancing The Load

Start by placing the heaviest bike closest to your vehicle. This position reduces stress on the rack. Spread the weight evenly across the rack. Avoid clustering bikes on one side.

Use the provided straps to secure each bike. Ensure they are tightly fastened. A well-balanced load minimizes wobbling and keeps your bikes stable.

Avoiding Overloading

Check your Thule bike rack's weight limit before loading. Exceeding this limit can cause instability.

Here’s a quick reference table for weight limits:

Rack Model Weight Limit (lbs)
Thule T2 Pro XT 120
Thule EasyFold XT 130
Thule Apex XT 150

Always distribute weight evenly. Avoid placing all heavy bikes on one side. This can lead to wobbling and potential damage to the rack.

If you have multiple bikes, follow these tips:

  1. Place the heaviest bike first.
  2. Alternate bike directions.
  3. Use all provided straps.

Keep these weight distribution tips in mind. They ensure a safe and wobble-free journey for your bikes.

Regular Maintenance Checks

Regular maintenance checks are crucial for your Thule bike rack. These checks ensure safety and longevity. This section will cover key areas for inspection.

Inspecting The Rack

Inspect the rack for any visible damage. Look for cracks, bends, or rust. A damaged rack can lead to a wobbly bike. Make sure the rack is securely attached to your vehicle. Check all bolts and nuts for tightness. Loose hardware can cause instability.

Checking For Wear And Tear

Wear and tear can affect your bike rack's performance. Examine the contact points where the bike touches the rack. Look for worn-out padding or straps. Replace them if they show signs of wear. The table below lists common areas to check:

Component What to Check
Padding Look for cracks or wear
Straps Check for fraying or looseness
Bolts Ensure all are tight and secure
Frame Look for bends, cracks, or rust

Regular checks are simple but vital. They keep your bike and rack safe. Inspect your Thule bike rack often to avoid issues.

Advanced Security Measures

When dealing with bike racks, ensuring your bikes stay secure is paramount. Wobbling can be a significant issue. Thule bike racks offer advanced security measures to eliminate this problem. Let's dive into the core components.

Anti-wobble Devices

Anti-wobble devices are essential in securing your bike rack. These devices fit snugly into the hitch receiver. They minimize movement and potential damage during transit. Here are some key features:

  • Easy Installation: Most anti-wobble devices are user-friendly.
  • Durability: Made from robust materials, they last long.
  • Compatibility: Fits various Thule bike rack models.

These features ensure your bikes remain stable. You can focus on your drive without worry.

Supplementary Straps

Supplementary straps add an extra layer of security. They provide additional support, reducing any remaining wobble. Key aspects include:

Feature Benefit
Adjustability Fits different bike sizes and shapes.
Material Quality High-quality straps ensure longevity.
Ease of Use Simple to attach and remove.

With these straps, your bikes are doubly secure. They prevent unwanted movement during the trip.

Troubleshooting Common Issues

Troubleshooting Common Issues with Thule Bike Rack Wobble

Dealing with a wobbly Thule bike rack can be frustrating. This guide helps you identify and fix common issues. Follow these steps to ensure a secure fit and smooth ride.

Identifying Source Of Wobble

Before fixing the wobble, you need to identify its source. Here are some common areas to check:

  • Mounting Points: Ensure the rack is securely attached to the vehicle.
  • Hitch Connection: Inspect the hitch receiver for any play or looseness.
  • Bike Mounts: Check if the bikes are tightly secured to the rack.

Quick Fixes

Once you know the problem area, you can apply these quick fixes:

Issue Solution
Loose Mounting Points Tighten all bolts and screws.
Hitch Play Use a hitch stabilizer to reduce movement.
Unsecured Bikes Reposition and secure bikes with straps.

Follow these steps for a stable and secure Thule bike rack. Enjoy a worry-free ride with your bikes safely in place.

Thule Bike Rack Wobble: How to Secure Your Ride Effectively

Credit: m.youtube.com

Frequently Asked Questions

Why Does My Thule Bike Rack Wobble?

A Thule bike rack may wobble due to improper installation, loose bolts, or an uneven load. Always check the manual for correct setup and ensure all parts are securely fastened.

How To Fix A Wobbly Thule Bike Rack?

To fix a wobbly Thule bike rack, tighten all bolts and screws. Redistribute the bike's weight evenly. If the wobble persists, consult the user manual or contact Thule support.

Is It Normal For Bike Racks To Wobble?

Some wobble is normal in bike racks. However, excessive wobble can indicate a problem. Regularly check and maintain your Thule bike rack to ensure safety.

Can A Hitch Extender Cause Wobbling?

Yes, a hitch extender can cause additional wobbling. It adds extra length and leverage, making the rack less stable. Use it only if necessary and secure it properly.

Conclusion

Ensuring your Thule bike rack is secure can prevent wobbling and damage. Regular maintenance checks are essential for safety. Proper installation and adjustments are key to a stable bike rack. Follow these tips to enjoy a smooth and safe biking experience.

Keep your adventures hassle-free with a wobble-free Thule bike rack.

Sunday, 1 December 2024

Mineral Oil For Bicycle Brakes: Enhance Performance and Longevity

Mineral oil is a popular choice for bicycle hydraulic brake systems. It is non-corrosive and safer for the environment.

Bicycle maintenance is crucial for optimal performance and safety. Mineral oil serves as an excellent hydraulic fluid for bicycle brakes. It prevents corrosion and offers stable performance across various temperatures. Riders appreciate its non-toxic nature and easy availability. Unlike other fluids, mineral oil does not damage rubber seals and gaskets.

This ensures the longevity of the braking system. Regularly checking and replacing the brake fluid enhances the bike's efficiency. Using mineral oil can significantly improve the reliability and responsiveness of the brakes. It is a preferred option for many cyclists, ensuring smooth and safe rides.

Introduction To Mineral Oil For Bicycle Brakes

Bicycle brakes are vital for safety. The brake fluid used can impact performance. There are different types of brake fluids. One of the most popular is mineral oil.

Importance Of Brake Fluids

Brake fluids help transfer force from levers to brake pads. This ensures efficient stopping power. Without proper brake fluid, brakes may fail or perform poorly.

  • Heat Resistance: Brake fluids resist high temperatures.
  • Lubrication: They keep brake components moving smoothly.
  • Corrosion Prevention: Fluids protect parts from rust and wear.

Why Choose Mineral Oil?

Mineral oil is a great choice for bike brakes. It offers several advantages:

  1. Non-Corrosive: Mineral oil doesn't corrode brake system parts.
  2. Long-Lasting: It has a longer lifespan than other fluids.
  3. Maintenance: Easier to maintain and replace.
Feature Mineral Oil Other Fluids
Corrosion Non-Corrosive Can corrode parts
Lifespan Long-Lasting Shorter lifespan
Maintenance Easy More complex

Choose mineral oil for reliable and efficient braking performance. Your bike will thank you!

Mineral Oil For Bicycle Brakes: Enhance Performance and Longevity

Credit: epicbleedsolutions.com

Benefits Of Mineral Oil

Mineral oil is a popular choice for bicycle brakes. It offers numerous advantages that improve the overall riding experience. This section explores the key benefits of using mineral oil in your bicycle brake system.

Enhanced Performance

Mineral oil enhances the performance of your bicycle brakes. It provides smooth and consistent braking power. The oil maintains its viscosity across a wide temperature range. This ensures reliable braking in both hot and cold conditions.

Mineral oil also helps to reduce brake fade. It maintains its properties under extreme conditions. This is crucial for long descents and aggressive riding styles. Riders can enjoy consistent braking without worrying about performance loss.

Longevity Of Brake System

Using mineral oil can extend the longevity of your brake system. It is non-corrosive, which protects the internal components. This reduces wear and tear, leading to a longer lifespan for your brake system.

Mineral oil is also less likely to absorb water. This prevents moisture from entering the brake system. Moisture can cause corrosion and degrade performance. By using mineral oil, you can maintain a clean and efficient brake system.

Here's a quick overview of the benefits:

Benefit Description
Enhanced Performance Smooth, consistent braking across temperatures
Brake Fade Reduction Maintains properties under extreme conditions
System Longevity Non-corrosive, less wear and tear
Moisture Resistance Prevents water absorption and corrosion

Choosing mineral oil for your bicycle brakes ensures better performance and longevity. Enjoy a safer and more reliable ride.

Types Of Mineral Oil

Mineral Oil For Bicycle Brakes

Mineral oil for bicycle brakes comes in different types. These types offer varied performance. This section explores synthetic and natural mineral oil. We also discuss popular brands and options available.

Synthetic Vs. Natural

Synthetic mineral oil is man-made. It often has additives. These additives enhance performance. Synthetic oil can handle extreme temperatures. It also reduces wear and tear. It is very popular among professional cyclists.

Natural mineral oil is derived from crude oil. It is more environmentally friendly. This type is also cost-effective. Natural oil works well in regular biking conditions. It provides smooth braking performance.

Brands And Options

There are many brands offering mineral oil. Each has unique features. Here are some popular brands:

  • Shimano - Known for high-quality synthetic oil.
  • Magura - Offers both synthetic and natural options.
  • Finish Line - Famous for its natural mineral oil.

Here is a comparison table of some options:

Brand Type Features
Shimano Synthetic High performance, extreme temperature resistance
Magura Natural Eco-friendly, cost-effective
Finish Line Natural Smooth braking, affordable

Choosing the right mineral oil depends on your needs. Synthetic oil suits high-performance biking. Natural oil is great for regular use. Consider the brands and options before making a choice.

How To Choose The Right Mineral Oil

Choosing the right mineral oil for bicycle brakes is crucial. It ensures optimal brake performance and longevity. There are several factors to consider. These include compatibility with brakes and viscosity considerations. Understanding these factors helps in making an informed choice.

Compatibility With Brakes

Not all mineral oils are compatible with every brake system. Always check your bike's manual. Ensure the oil matches the brake system requirements. Using the wrong oil can damage your brakes. It could also void your warranty.

Brake System Recommended Mineral Oil
Shimano Shimano Mineral Oil
Magura Magura Royal Blood

Refer to the table for common brake systems. Use the recommended oil for best results.

Viscosity Considerations

Viscosity affects brake performance, especially in different temperatures. Thicker oils perform better in high heat. Thinner oils are better for cold conditions. Always check the viscosity rating of the mineral oil. It ensures suitability for your riding conditions.

  • High Viscosity: Better for hot climates.
  • Low Viscosity: Better for cold climates.

Understanding these factors helps in choosing the right mineral oil. It ensures your bike brakes perform optimally in all conditions.

Steps For Replacing Brake Fluid

Replacing the brake fluid in your bicycle brakes ensures optimal performance. Follow these steps to replace the brake fluid yourself. This guide will make the process simple and efficient.

Tools And Materials Needed

  • Mineral oil brake fluid
  • Bleed kit
  • Allen wrenches
  • Clean rags
  • Plastic syringe
  • Catch bottle
  • Gloves
  • Safety glasses

Step-by-step Guide

  1. Prepare your workspace: Ensure your bike is stable. Use a bike stand if possible.
  2. Remove the wheel: Use an Allen wrench to take off the wheel. This provides better access to the brake caliper.
  3. Insert bleed block: Place a bleed block between the brake pads. This prevents them from closing.
  4. Attach the bleed kit: Connect the syringe to the bleed port on the caliper. Ensure a tight fit.
  5. Open the bleed port: Use an Allen wrench to open the bleed port. Be ready with the catch bottle.
  6. Flush old fluid: Push the syringe to force out old fluid. Collect it in the catch bottle.
  7. Add new fluid: Fill the syringe with fresh mineral oil. Slowly push the oil into the system.
  8. Close the bleed port: Tighten the bleed port using the Allen wrench. Ensure there are no leaks.
  9. Remove the bleed kit: Detach the syringe and clean any spilled fluid.
  10. Reinstall the wheel: Secure the wheel back in place using the Allen wrench.
  11. Test the brakes: Squeeze the brake lever to ensure proper function. Check for any air bubbles.
  12. Clean up: Wipe down any excess fluid. Dispose of old fluid safely.

Following these steps will keep your bicycle brakes in top condition. Always wear safety gear during the process.

Mineral Oil For Bicycle Brakes: Enhance Performance and Longevity

Credit: www.finishlineusa.com

Maintenance Tips For Brake Systems

Maintaining your bicycle's brake system is essential for safety. Regular care ensures your brakes perform their best. Mineral oil is a key component in keeping them smooth.

Regular Inspections

Check your brake system every month. Look for leaks, dirt, and wear.

  • Ensure brake pads are not worn out.
  • Inspect brake hoses for cracks or leaks.
  • Check brake fluid levels.

Signs Of Wear And Tear

Be aware of common signs that indicate brake issues. Addressing these signs early can prevent accidents.

Sign Description
Spongy Brakes Brakes feel soft when pressed.
Noise Brakes make squeaking or grinding sounds.
Reduced Performance Brakes take longer to stop the bike.

Check these signs regularly to keep your bike safe. Remember, mineral oil helps maintain brake efficiency.

Common Issues And Troubleshooting

Using mineral oil for bicycle brakes can sometimes cause problems. Knowing how to spot and fix these issues is important. Below are common problems and their solutions.

Air Bubbles In The System

Air bubbles can make your brakes feel spongy. This happens if air gets into the brake lines. Follow these steps to remove air bubbles:

  1. Check the brake lever for a soft feel.
  2. Use a bleed kit to remove the air bubbles.
  3. Attach the syringe to the bleed port.
  4. Push mineral oil through the brake lines.
  5. Watch for air bubbles escaping from the system.

Repeat the process until no more air bubbles appear. This ensures your brakes work correctly.

Leaking Brake Fluid

Leaking brake fluid can lead to poor brake performance. Here are the steps to check for and fix leaks:

  • Inspect the brake lines and connections.
  • Look for visible signs of fluid leakage.
  • Tighten any loose connections.
  • Replace damaged parts if needed.

Regular inspection can prevent major issues. Always use the correct type of mineral oil for your brakes.

Issue Symptoms Solution
Air Bubbles Spongy brake lever Bleed the brake system
Leaking Fluid Visible fluid around brakes Inspect and tighten connections

By following these steps, you can keep your brakes in top condition. Happy riding!

Environmental Considerations

Using mineral oil for bicycle brakes is common. Yet, it's important to consider the environment. This section explores key aspects like the disposal of used mineral oil and eco-friendly alternatives.

Disposal Of Used Mineral Oil

Used mineral oil can harm the environment if not disposed of properly. Always follow local guidelines for disposal. Here are steps to ensure safe disposal:

  • Collect the used oil in a sealed container.
  • Label the container as "Used Mineral Oil".
  • Take it to a local recycling center.
  • Never pour the oil down the drain or on the ground.
Step Action
1 Collect the used oil in a sealed container.
2 Label the container as "Used Mineral Oil".
3 Take it to a local recycling center.
4 Never pour the oil down the drain or on the ground.

Eco-friendly Alternatives

Consider eco-friendly alternatives to mineral oil. These alternatives reduce environmental impact. Here are a few options:

  1. Vegetable-Based Oils: These are biodegradable and less harmful.
  2. Synthetic Oils: Some are designed to be more environmentally friendly.

Using these alternatives can make a big difference. Always check the product details to ensure they are eco-friendly.

Mineral Oil For Bicycle Brakes: Enhance Performance and Longevity

Credit: m.youtube.com

Frequently Asked Questions

What Is Mineral Oil For Bicycle Brakes?

Mineral oil is a hydraulic fluid used in bicycle brakes. It helps in transferring force from the brake lever to the brake caliper. It is non-corrosive and has a longer lifespan compared to other fluids.

Why Use Mineral Oil In Bicycle Brakes?

Mineral oil is non-corrosive and doesn't absorb moisture. It provides consistent braking performance. It also requires less maintenance and has a longer lifespan than other brake fluids.

How Often Should I Change Mineral Oil?

Change the mineral oil every 1 to 2 years. Regular maintenance ensures optimal braking performance. Check for signs of contamination or reduced braking efficiency.

Is Mineral Oil Better Than Dot Fluid?

Mineral oil is non-corrosive and has a longer lifespan. DOT fluid absorbs moisture but can handle higher temperatures. Both have their advantages depending on your riding conditions.

Conclusion

Choosing mineral oil for your bicycle brakes ensures smooth, reliable performance. It's a safe, effective option for riders. Regular maintenance with mineral oil extends brake life and improves safety. Always follow manufacturer guidelines for the best results. Keep your bicycle brakes in top condition with high-quality mineral oil.

Enjoy your rides with confidence!

Saturday, 30 November 2024

Bike Sharing New York City: A Revolution in Urban Transit

Bike sharing in New York City offers a convenient and eco-friendly transportation alternative. It enhances mobility and reduces traffic congestion.

New York City's bike-sharing program, Citi Bike, has revolutionized urban transportation. Launched in 2013, it provides a network of easily accessible bicycles available for short-term use. Users can pick up and drop off bikes at various docking stations across the city, making it ideal for commuting and sightseeing.

The system is designed to be affordable, encouraging more people to opt for cycling over driving. With thousands of bikes and stations, Citi Bike has become a popular choice for residents and tourists alike. It promotes a healthier lifestyle and contributes to the city's sustainability efforts.

Bike Sharing New York City: A Revolution in Urban Transit

Credit: www.msnbc.com

Historical Background

New York City's bike-sharing system has a rich history. It began with small steps and has grown immensely over the years. This section delves into its journey.

Early Beginnings

The concept of bike-sharing in New York City started in the early 2000s. Small pilot programs tested the feasibility of shared bikes. These initial attempts were mostly community-led initiatives. They aimed to provide an eco-friendly transport option.

In 2009, the city government got involved. They launched a study to explore large-scale bike-sharing. This was the first official step towards a city-wide system. The study showed positive results, and plans for expansion began.

Expansion Over Time

In 2013, New York City launched its first official bike-sharing program, Citi Bike. The program started with 6,000 bikes and 330 stations. It was an instant hit among residents and tourists.

Since then, Citi Bike has grown rapidly. By 2020, it had over 15,000 bikes and 1,000 stations. The system now covers most of Manhattan, Brooklyn, Queens, and parts of the Bronx. This expansion made bike-sharing more accessible to a larger population.

Today, New York City's bike-sharing program is one of the largest in the world. It continues to grow, with plans for more bikes and stations. The city's commitment to eco-friendly transportation is evident in this ongoing expansion.

Bike Sharing New York City: A Revolution in Urban Transit

Credit: upgo.lab.mcgill.ca

How It Works

Bike sharing in New York City is a convenient way to travel. It allows you to rent a bike from one location and return it to another. This eco-friendly option is perfect for short trips. Here's how to get started.

Getting Started

First, locate a bike station near you. You can use the bike-sharing app or website. The app will show available bikes and docks in real-time. Once at the station, follow these steps:

  1. Choose a bike from the dock.
  2. Use your membership key or the app to unlock the bike.
  3. Adjust the seat height for comfort.
  4. Enjoy your ride!

Membership Options

There are different membership options to fit your needs. Here's a table to help you choose:

Membership Type Cost Duration
Single Ride $3.50 30 minutes
Day Pass $12 24 hours
Monthly Membership $25 30 days
Annual Membership $169 1 year

Choose the membership that best suits your travel needs. Single rides are great for quick trips. Day passes are ideal for tourists. Monthly and annual memberships are perfect for regular users. Enjoy the freedom and convenience of bike sharing in New York City!

Benefits Of Bike Sharing

Bike sharing in New York City offers many benefits for locals and tourists. It provides a convenient, affordable way to get around the city. Here are some key benefits of bike sharing:

Environmental Impact

Bike sharing helps reduce air pollution. Fewer cars on the road means less harmful emissions. It also helps reduce traffic congestion. This leads to less idling and fewer greenhouse gases. Using bikes instead of cars lowers the city’s carbon footprint.

Bike sharing also promotes sustainable transportation. It reduces the need for parking spaces. This allows for more green spaces in the city. A cleaner, greener city benefits everyone.

Health And Fitness

Bike sharing is great for your health and fitness. Riding a bike is a good way to exercise. It helps burn calories and improves cardiovascular health. Regular biking can lead to better fitness levels.

Biking is also good for mental health. It reduces stress and improves mood. Regular biking can help you feel happier and more relaxed. It’s a fun way to stay fit and healthy.

Benefit Details
Environmental Impact Reduces air pollution, traffic congestion, and carbon footprint.
Health and Fitness Improves cardiovascular health, burns calories, reduces stress.
  • Convenient
  • Affordable
  • Reduces traffic
  • Promotes exercise

Challenges And Solutions

Bike sharing in New York City offers convenience and eco-friendly commuting. Yet, there are challenges that need addressing. Effective solutions are essential to improve the system.

Infrastructure Issues

New York City's streets are often crowded. Limited bike lanes make navigation tough. Bike stations sometimes lack enough space. This causes congestion.

To solve this, more bike lanes are needed. Expanding bike stations is crucial. Advanced technology can help manage bike availability. A well-organized system ensures smooth operations.

Safety Concerns

Safety is a major worry for riders. Accidents can happen due to traffic. Poor lighting at night increases risk.

Wearing helmets is vital for safety. Reflective gear helps riders stay visible. Educating riders about traffic rules is key. Enforcement of bike laws ensures adherence.

Challenge Solution
Limited bike lanes Build more bike lanes
Congested stations Expand bike stations
Accidents Promote helmet use
Poor lighting Install better lights

Improving infrastructure and safety measures can enhance the bike-sharing experience. This makes biking in New York City more enjoyable and secure.

Technological Innovations

Bike sharing in New York City has transformed with new technological innovations. These advancements have made it easier and more enjoyable to use bike-sharing services. Two key innovations are mobile apps and smart bikes.

Mobile Apps

Mobile apps are essential for bike-sharing in New York City. These apps provide real-time information about bike availability and docking stations. Users can quickly locate the nearest bike station with a few taps.

The apps also offer a seamless rental process. Riders can unlock bikes using QR codes or Bluetooth. Payments are secure and straightforward, allowing users to ride without hassle.

Feature Description
Real-time Information Shows bike and dock availability
Easy Rentals Unlock bikes with QR codes or Bluetooth
Secure Payments Safe and simple payment options

Smart Bikes

Smart bikes are another innovation in New York City's bike-sharing system. These bikes come equipped with advanced technology. They have GPS tracking, making it easy to locate and secure them.

Smart bikes also feature automatic gear shifting. This makes riding smoother and more enjoyable. The built-in sensors monitor the bike's condition and notify the service team when maintenance is needed.

  • GPS Tracking: Locate bikes easily and ensure security.
  • Automatic Gear Shifting: Enjoy a smooth ride every time.
  • Condition Monitoring: Sensors notify for maintenance needs.

Community Impact

Bike sharing in New York City has a broad community impact. This sustainable mode of transport benefits everyone. Here, we explore how it boosts the local economy and promotes social equity.

Local Economy

Bike sharing supports the local economy in many ways.

  • It creates new jobs for bike maintenance and customer support.
  • Local shops see more foot traffic from cyclists.
  • Bike stations often attract new businesses to the area.

A table below shows economic benefits:

Economic Benefit Impact
New Jobs 100+ jobs created
Local Shops 20% increase in sales
New Businesses 15 new startups

Social Equity

Bike sharing promotes social equity by making transport accessible.

  1. Bikes are available in low-income neighborhoods.
  2. Affordable pricing plans help everyone use the service.
  3. Special programs support people with disabilities.

These measures ensure everyone can benefit from bike sharing. They make the city more inclusive and fair.

Future Prospects

Bike sharing in New York City has seen incredible growth. With the system's success, the future prospects look bright. Let's explore what's ahead for bike sharing in NYC.

Upcoming Projects

Several exciting projects are in the pipeline. These projects aim to expand the bike-sharing network.

  • New Stations: Plans to add 100 new stations across the city.
  • Electric Bikes: Introduction of more electric bikes for longer rides.
  • App Upgrades: Improved app features for better user experience.

Long-term Vision

The long-term vision for bike sharing in NYC is ambitious. It aims to make the city more bike-friendly.

  1. City-Wide Coverage: Ensure every neighborhood has easy access to bikes.
  2. Environmental Goals: Reduce traffic congestion and lower carbon emissions.
  3. Safety Measures: Implement new safety features and bike lanes.
Project Details
New Stations 100 new stations to be added city-wide
Electric Bikes More electric bikes for longer and easier rides
App Upgrades Better user experience with new app features
City-Wide Coverage Bikes available in every neighborhood
Environmental Goals Lower traffic and carbon emissions
Safety Measures New safety features and bike lanes
Bike Sharing New York City: A Revolution in Urban Transit

Credit: checksandbalancesproject.org

Frequently Asked Questions

What Is Bike Sharing In Nyc?

Bike sharing in NYC is a public bicycle system. Users can rent bikes for short trips. It's convenient for commuting and sightseeing.

How Do I Rent A Bike In Nyc?

To rent a bike, use the Citi Bike app. Find a nearby station, unlock a bike, and start riding.

Are There Bike Lanes In New York City?

Yes, NYC has extensive bike lanes. These lanes make cycling safer and more accessible for everyone.

How Much Does Bike Sharing Cost In Nyc?

Bike sharing costs vary. A single ride starts at $3. 50. Monthly and annual memberships offer savings.

Conclusion

Bike sharing in New York City offers a convenient and eco-friendly transportation option. It's perfect for short commutes and exploring the city. With numerous stations, it's easy to rent and return bikes. Embrace this sustainable mode of transport and enjoy a healthier, greener lifestyle in the bustling metropolis.

Friday, 29 November 2024

Exercise Bike Handlebar Extensions: Boost Your Workout Efficiency

Exercise bike handlebar extensions enhance comfort and performance during workouts. They provide additional hand positions, reducing fatigue.

Exercise bike handlebar extensions are essential for anyone seeking to improve their cycling experience. These extensions offer multiple grip options, which help in reducing hand and wrist fatigue during prolonged sessions. They also allow for better posture, which can lead to more efficient and effective workouts.

Cyclists can maintain a more aerodynamic position, which can improve performance. Handlebar extensions are easy to install and adjust, making them suitable for beginners and advanced cyclists alike. With these benefits, exercise bike handlebar extensions become a valuable addition to any home gym setup, ensuring that users stay comfortable and motivated during their workouts.

Exercise Bike Handlebar Extensions: Boost Your Workout Efficiency

Credit: cyclingdealusa.com

Benefits Of Handlebar Extensions

Exercise bike handlebar extensions provide a range of benefits for riders. These enhancements can significantly improve your cycling experience. Below, we'll explore the key advantages of handlebar extensions.

Enhanced Comfort

Handlebar extensions offer enhanced comfort during long rides. They allow you to adjust your hand position. This reduces the strain on your wrists and shoulders.

With more hand positions, you can prevent numbness. This makes your cycling sessions more enjoyable and less painful.

Hand Position Benefit
Neutral Reduces wrist strain
Forward Improves aerodynamics
Wide Enhances stability

Improved Posture

Handlebar extensions help improve your posture while cycling. A good posture is key to avoiding back pain. With extensions, you can sit up straight more easily.

Better posture also means more efficient breathing. This can boost your overall performance and stamina.

  • Reduces back pain
  • Enhances breathing efficiency
  • Boosts overall performance

Types Of Handlebar Extensions

Exercise bikes are great for indoor workouts. Adding handlebar extensions can enhance your ride. There are different types of handlebar extensions. Each has unique benefits.

Aero Bars

Aero bars are designed for speed and efficiency. They let you lean forward. This reduces wind resistance. You can ride faster and longer.

Aero bars are common in triathlons. They help cyclists maintain a streamlined position. They also reduce strain on the back. This makes them ideal for long rides.

  • Improves speed
  • Reduces wind resistance
  • Provides a streamlined position
  • Less strain on the back

Bullhorn Bars

Bullhorn bars offer multiple hand positions. This makes them versatile. They are named for their shape. The ends curve forward like bullhorns.

These bars are popular among urban cyclists. They provide better control. They also give a more aggressive riding position. This helps in sprints and climbs.

  • Multiple hand positions
  • Better control
  • Aggressive riding position
  • Ideal for sprints and climbs

Choosing The Right Extension

Choosing the Right Extension for Your Exercise Bike

Exercise bike handlebar extensions improve comfort and performance. Choosing the right extension is crucial for an optimal workout. This section covers essential factors to consider.

Material Considerations

The material of the extension affects its durability and comfort. Common materials include aluminum, carbon fiber, and steel. Each has its own benefits.

  • Aluminum: Lightweight, durable, and affordable.
  • Carbon Fiber: Extremely light, strong, and absorbs vibrations.
  • Steel: Very strong and durable but heavier.

Compatibility

Compatibility ensures the extension fits your bike. Check the handlebar diameter and attachment type.

Aspect Details
Handlebar Diameter: Measure your handlebar's diameter to match the extension.
Attachment Type: Verify the extension's attachment mechanism matches your bike.
Exercise Bike Handlebar Extensions: Boost Your Workout Efficiency

Credit: www.youtube.com

Installation Tips

Installing handlebar extensions on your exercise bike can enhance your workout. Follow these tips for a smooth installation process. Proper tools and a step-by-step approach ensure success.

Tools Needed

Before starting, gather the following tools:

  • Allen Wrenches - Various sizes
  • Screwdrivers - Phillips and flathead
  • Adjustable Wrench
  • Lubricant - For smoother installation
  • Measuring Tape

Step-by-step Guide

Follow this step-by-step guide to install your handlebar extensions:

  1. Prepare Your Bike
    • Place your bike on a flat surface.
    • Ensure the bike is stable.
  2. Remove Existing Handlebars
    • Use the Allen wrench to loosen screws.
    • Remove the handlebars carefully.
  3. Attach Handlebar Extensions
    • Align the extensions with the handlebar base.
    • Insert screws into the designated holes.
  4. Tighten Screws
    • Use the Allen wrench to tighten all screws.
    • Check for any loose parts.
  5. Adjust Handlebar Position
    • Use the measuring tape to set the desired height.
    • Tighten screws again if needed.
  6. Test Stability
    • Press down on the handlebars.
    • Ensure they are firmly in place.

Following these installation tips ensures your new handlebar extensions are securely attached and ready for use.

Adjusting For Optimal Use

To get the most out of your exercise bike, proper handlebar adjustments are crucial. Well-adjusted handlebars ensure comfort, improve performance, and reduce injury risks. Here, we explore the key adjustments to make your ride optimal.

Height Adjustment

Proper height adjustment of the handlebars can enhance your comfort. Follow these steps for the correct height:

  • Loosen the adjustment knob or lever.
  • Raise or lower the handlebars to match your shoulder height.
  • Tighten the knob or lever securely.

Handlebars at shoulder height offer the best balance between comfort and control.

Angle Adjustment

The angle adjustment of the handlebars can significantly impact your riding experience. Adjust the angle by:

  1. Loosening the bolts or quick-release mechanism.
  2. Tilting the handlebars slightly forward or backward.
  3. Securing the bolts or mechanism again.

A slight forward tilt often provides better aerodynamics and comfort. Adjusting the angle helps in reducing strain on your wrists and shoulders.

Safety Precautions

Using exercise bike handlebar extensions can enhance your workout. But it's crucial to follow safety precautions. Mistakes can lead to injury. Below are key safety tips for using handlebar extensions.

Proper Grip

A proper grip on the handlebars is essential. Make sure your hands are placed firmly. This prevents slipping. Keep your wrists straight to avoid strain. Use gloves for better grip and comfort. Always maintain control of the handlebars.

  • Place hands firmly on the handlebars.
  • Keep wrists straight to avoid strain.
  • Use gloves for better grip.
  • Maintain control at all times.

Regular Maintenance

Regular maintenance of your exercise bike is key. Check the handlebar extensions for wear. Tighten any loose parts. Clean the handlebars to remove sweat and grime. Lubricate moving parts to ensure smooth operation. Follow the manufacturer's maintenance guidelines.

Maintenance Task Frequency
Check for wear Weekly
Tighten loose parts Weekly
Clean handlebars After each use
Lubricate moving parts Monthly

Following these safety precautions can help you have a safer, more effective workout. Always prioritize safety and regular maintenance.

Workout Routines With Extensions

Exercise bike handlebar extensions offer new workout possibilities. They enhance both cardio and strength training routines. Here are some exciting ways to incorporate these extensions into your workouts.

Cardio Workouts

Cardio workouts on an exercise bike can be more dynamic with handlebar extensions. These extensions allow for varied hand positions, making rides more comfortable.

  • Interval Training: Alternate between high-intensity sprints and recovery periods.
  • Steady-State Riding: Maintain a consistent pace for 30-45 minutes.
  • Hill Climbing: Simulate uphill rides by increasing resistance.

Using different hand positions can help target various muscle groups. This leads to a more balanced workout.

Strength Training

Strength training on an exercise bike with handlebar extensions can be very effective. You can engage your upper body while pedaling.

  1. Standing Pedals: Stand up while pedaling to engage core and leg muscles.
  2. Push-Ups: Perform push-ups on the handlebars during rest intervals.
  3. Resistance Training: Use higher resistance settings to build muscle strength.

By incorporating these exercises, you can achieve a full-body workout. This makes your exercise routine more efficient.

Exercise Bike Handlebar Extensions: Boost Your Workout Efficiency

Credit: www.amazon.com

Expert Recommendations

Choosing the right exercise bike handlebar extensions is crucial. Experts offer valuable insights to help you make an informed decision. This guide covers top brands and customer reviews to ensure you pick the best.

Top Brands

Experts recommend several top brands for handlebar extensions:

Brand Features
Schwinn Ergonomic design, easy installation, durable materials
ProForm Adjustable, comfortable grip, high-quality build
Peloton Customizable, sleek design, premium quality
Nautilus Sturdy, versatile, user-friendly

Customer Reviews

Customer feedback is essential for picking the right handlebar extensions. Here are some highlights:

  • Schwinn: Users love the ergonomic design and easy installation.
  • ProForm: Customers praise the adjustable features and comfortable grip.
  • Peloton: Reviewers appreciate the sleek design and premium quality.
  • Nautilus: Users commend the sturdy build and user-friendly features.

These recommendations ensure you find handlebar extensions that meet your needs.

Frequently Asked Questions

What Are Exercise Bike Handlebar Extensions?

Exercise bike handlebar extensions are additional attachments for handlebars. They provide extra grip positions for better comfort. These extensions can help improve posture and reduce strain during workouts.

Why Use Handlebar Extensions On Exercise Bikes?

Handlebar extensions offer multiple grip positions, enhancing comfort. They help reduce strain on wrists and back. This can lead to a more efficient and enjoyable workout experience.

How To Install Handlebar Extensions?

To install handlebar extensions, simply attach them to your existing handlebars. Follow the manufacturer's instructions for a secure fit. Ensure they are tightly secured to avoid any movement during exercise.

Do Handlebar Extensions Fit All Exercise Bikes?

Not all handlebar extensions are universal. Check the compatibility with your exercise bike model. Always refer to the manufacturer’s guidelines before purchase.

Conclusion

Enhance your cycling experience with exercise bike handlebar extensions. These extensions provide comfort and better posture. Investing in handlebar extensions can make your workouts more effective and enjoyable. Consider adding them to your exercise routine for optimal results. Achieve your fitness goals with ease and comfort.

Wednesday, 27 November 2024

Bike Rollers Vs Trainers: Which is Best for Your Indoor Cycling?

Bike rollers offer a natural ride feel, while trainers provide more stability and resistance options. Both have unique benefits for cyclists.

Cyclists face a common dilemma: choosing between bike rollers and trainers. Bike rollers simulate outdoor riding with a free-floating experience, improving balance and bike handling skills. Trainers, on the other hand, offer more stability, making them ideal for intense interval training and focused workouts.

Both options cater to different training needs and preferences. Rollers are excellent for improving technique and core strength, while trainers are perfect for structured workouts and power measurement. Cyclists must consider their training goals, experience level, and space constraints before making a choice. Each has its distinct advantages, ensuring a suitable option for every rider.

What Are Bike Rollers?

Bike rollers are a popular indoor training tool for cyclists. They help improve balance, technique, and overall cycling performance. Unlike trainers, rollers allow both wheels to spin freely, simulating real road conditions.

Basic Design

The basic design of bike rollers is simple yet effective. They consist of three cylinders or drums. These drums are arranged in a triangular configuration. The front drum is connected to the two rear drums by a rubber belt. This belt ensures the front wheel spins in sync with the rear wheel.

Bike rollers come in various materials, like aluminum and plastic. Each material affects the roller's weight and performance. Some rollers also have adjustable resistance settings. This feature helps simulate different riding conditions.

How They Work

Using bike rollers is straightforward. Place your bike on the rollers. Make sure the front wheel sits on the front drum. The rear wheel should rest between the two rear drums. Mount your bike carefully and start pedaling. The wheels will spin, and the rollers will rotate.

Balancing on bike rollers is challenging at first. It requires focus and core strength. Over time, you will improve your balance and control. This training method is excellent for building endurance and enhancing pedaling efficiency.

Below is a simple table comparing bike rollers to trainers:

Feature Bike Rollers Trainers
Balance Improves significantly Minimal improvement
Realistic Ride Feel High Moderate
Setup Time Quick Varies
  • Balance: Rollers help cyclists improve their balance significantly.
  • Realistic Ride Feel: Provides a more road-like experience.
  • Setup Time: Setting up bike rollers is generally quick and easy.
Bike Rollers Vs Trainers: Which is Best for Your Indoor Cycling?

Credit: saris.com

What Are Bike Trainers?

Bike Rollers Vs Trainers: What Are Bike Trainers?

Bike trainers are stationary devices. They let you ride your bike indoors. This is great for when the weather is bad. Bike trainers are also useful for controlled training sessions.

Types Of Trainers

There are different types of bike trainers. Each type has unique features. Let's look at the common ones:

  • Wheel-On Trainers: Your bike's rear wheel stays on. This type is easy to set up.
  • Direct-Drive Trainers: You remove the rear wheel. These are more accurate and quieter.
  • Smart Trainers: These connect to apps. They offer interactive workouts and data tracking.

Functionality Overview

Bike trainers provide resistance to mimic real rides. Here are key points:

  • Resistance can be magnetic, fluid, or wind-based.
  • Some trainers adjust resistance automatically.
  • Smart trainers sync with apps for a virtual ride experience.
  • Direct-drive trainers reduce tire wear and provide better power data.

Pros And Cons Of Bike Rollers

Bike rollers are a popular choice for indoor cycling. They offer a unique riding experience. Understanding their pros and cons can help you decide if they suit your needs.

Advantages

Bike rollers have many benefits. Here are some key advantages:

  • Improves Balance: Rollers help enhance your balance and coordination.
  • Realistic Ride Feel: They provide a natural, road-like feel.
  • Easy Setup: Rollers are simple to set up and use.
  • Portable: They are lightweight and easy to move.
  • Quiet Operation: Rollers produce less noise compared to trainers.

Disadvantages

Despite their benefits, bike rollers have some downsides:

  • Steep Learning Curve: It takes time to master riding on rollers.
  • Less Stability: Rollers offer less stability than trainers.
  • Limited Resistance: They often lack adjustable resistance levels.
  • Safety Concerns: Falling off rollers is a common risk.
  • Not Ideal for High-Intensity Workouts: Rollers are less suited for intense training sessions.

Here is a quick comparison table:

Advantages Disadvantages
Improves Balance Steep Learning Curve
Realistic Ride Feel Less Stability
Easy Setup Limited Resistance
Portable Safety Concerns
Quiet Operation Not Ideal for High-Intensity Workouts

Pros And Cons Of Bike Trainers

Bike trainers are a popular choice for indoor cycling. They offer various benefits and drawbacks that suit different needs. This section covers the pros and cons of bike trainers.

Benefits

Bike trainers provide a stable and controlled environment for cycling. Here are some key benefits:

  • Weatherproof Training: Ride indoors regardless of weather conditions.
  • Convenience: Train at any time without leaving your home.
  • Consistency: Maintain a regular training schedule.
  • Safety: Avoid traffic and road hazards.
  • Customizable Resistance: Adjust resistance to match your training needs.

Drawbacks

While bike trainers offer many benefits, they also have some drawbacks:

  • Cost: High-quality trainers can be expensive.
  • Noise: Some trainers can be quite loud.
  • Space: They require a dedicated space in your home.
  • Monotony: Indoor cycling can become boring.
  • Wear and Tear: Increased wear on bike tires and components.
Pros Cons
Weatherproof Training Cost
Convenience Noise
Consistency Space
Safety Monotony
Customizable Resistance Wear and Tear

Performance And Skill Development

Understanding the differences between bike rollers and trainers is crucial for cyclists. Each offers unique benefits for performance and skill development. Whether you aim to improve your balance or increase your power, choosing the right tool is essential. Let’s dive into the specifics.

Rollers For Balance

Bike rollers are excellent for enhancing balance and coordination. Cyclists must maintain stability while riding on the rollers, which simulates outdoor conditions. This practice strengthens core muscles and improves bike handling skills.

Rollers help cyclists develop a smooth, efficient pedal stroke. This is crucial for maintaining speed and endurance. The continuous motion required on rollers mimics real road riding, offering a more realistic training experience.

Training on rollers also boosts mental focus. Riders must stay alert and concentrated to avoid falling off. This mental sharpness translates well to outdoor cycling.

Trainers For Power

Bike trainers are designed to build power and strength. They provide resistance that can be adjusted to simulate different terrains and intensities. This makes trainers ideal for interval training and structured workouts.

Trainers offer a stable platform, allowing cyclists to push harder without worrying about balance. This stability is perfect for performing high-intensity workouts, sprints, and endurance training.

With trainers, cyclists can track their performance metrics accurately. This data includes power output, cadence, and speed. Monitoring these metrics helps in setting and achieving performance goals.

Aspect Bike Rollers Bike Trainers
Focus Balance and Coordination Power and Strength
Training Type Endurance, Smooth Pedaling Interval, High-Intensity Workouts
Stability Requires Balance Stable Platform
Performance Tracking Limited Accurate Metrics

Space And Portability

Choosing between bike rollers and trainers often comes down to space and portability. Both options offer unique benefits, but their size and ease of storage can make a significant difference. Let's explore how these two options stack up in terms of space and portability.

Storage Solutions

Bike rollers are generally more compact and lightweight. You can easily fold and store them under a bed or in a closet. This makes them perfect for small apartments or homes with limited space.

Trainers, on the other hand, tend to be bulkier. They often require dedicated space for storage. Some trainers come with detachable parts, making them slightly easier to store. However, they still take up more room compared to rollers.

Feature Bike Rollers Trainers
Weight Lightweight Heavier
Foldability Fully foldable Partially foldable
Storage Space Minimal Moderate to High

Ease Of Setup

Setting up bike rollers is straightforward. Unfold them, place them on a flat surface, and you're ready to ride. No additional tools are needed. This simplicity makes them user-friendly.

Trainers usually involve a more complex setup. You often need to attach your bike to the trainer. This can take a few minutes and may require tools. While not overly complicated, it is more time-consuming compared to rollers.

  • Bike Rollers:
    • No tools required
    • Quick setup
  • Trainers:
    • May require tools
    • More time-consuming

Cost Comparison

When deciding between bike rollers and trainers, cost plays a crucial role. Both options have different price ranges and offer varying value for money. This section breaks down the costs associated with each to help you make an informed decision.

Price Range

Bike rollers and trainers come in a wide range of prices. Here's a general breakdown:

Type Price Range
Bike Rollers $80 - $400
Bike Trainers $100 - $1,200

Bike rollers are usually more affordable. They start at around $80 and can go up to $400. Bike trainers have a broader range. Basic models start at $100 and high-end models can cost up to $1,200. The price depends on the features and build quality.

Value For Money

Both bike rollers and trainers provide good value, but in different ways:

  • Bike Rollers: Ideal for improving balance and technique. They offer a simple, effective workout.
  • Bike Trainers: Provide more resistance options and advanced features. They are better for intense workouts and tracking progress.

If you want a budget-friendly option, bike rollers are a great choice. They offer excellent value, especially for riders focusing on balance and endurance. For those seeking advanced features and resistance settings, bike trainers are worth the investment. High-end trainers come with smart features like Bluetooth connectivity and power meters, enhancing the overall experience.

Bike Rollers Vs Trainers: Which is Best for Your Indoor Cycling?

Credit: roadcyclinguk.com

User Preferences And Goals

Choosing between bike rollers and trainers can be tricky. Each has unique benefits. Your preferences and goals will guide your choice. This section explores how fitness objectives and personal experiences influence decisions.

Fitness Objectives

Fitness goals play a big role in your choice. If you aim for improved balance and bike handling, bike rollers are ideal. They enhance your core strength and bike control. For those targeting power and endurance, trainers are better. Trainers offer adjustable resistance and structured workouts.

Objective Best Choice
Improved balance Bike Rollers
Core strength Bike Rollers
Power training Trainers
Endurance Trainers

Personal Experience

Personal experience also shapes preferences. Cyclists with a background in outdoor biking often prefer rollers. Rollers mimic road conditions, providing a realistic feel. Those new to cycling or focused on structured workouts may lean towards trainers. Trainers are stable and easy to use, making them suitable for beginners.

  • Experienced Cyclists: Prefer the natural feel of rollers.
  • Beginners: Opt for the stability of trainers.
  • Structured Workouts: Trainers offer better control and data tracking.

Understanding your fitness goals and personal experience helps in making the right choice. Both bike rollers and trainers offer unique benefits tailored to different needs.

Bike Rollers Vs Trainers: Which is Best for Your Indoor Cycling?

Credit: ilovebicycling.com

Frequently Asked Questions

What Are Bike Rollers?

Bike rollers are a type of indoor cycling equipment. They consist of three cylinders that spin as you pedal. They help improve balance and bike handling skills.

What Are Bike Trainers?

Bike trainers are stationary devices that attach to your bike's rear wheel. They provide resistance, simulating outdoor riding conditions. They are ideal for focused training sessions.

Which Is Better For Beginners?

Bike trainers are generally better for beginners. They offer stability and controlled resistance. This makes them easier to use and safer for those new to indoor cycling.

Do Bike Rollers Improve Balance?

Yes, bike rollers improve balance. They require you to maintain stability while pedaling. This helps enhance your overall bike handling skills.

Conclusion

Choosing between bike rollers and trainers depends on your cycling goals. Rollers improve balance and technique, while trainers offer stability and resistance control. Evaluate your needs and pick the option that aligns with your training objectives. Both tools can enhance your indoor cycling experience and fitness level.

Happy riding!

Kmc X10 10 Speed Chain: Ultimate Performance for Cyclists

The KMC X10 10 Speed Chain is a durable, lightweight chain designed for smooth shifting and long-lasting performan...