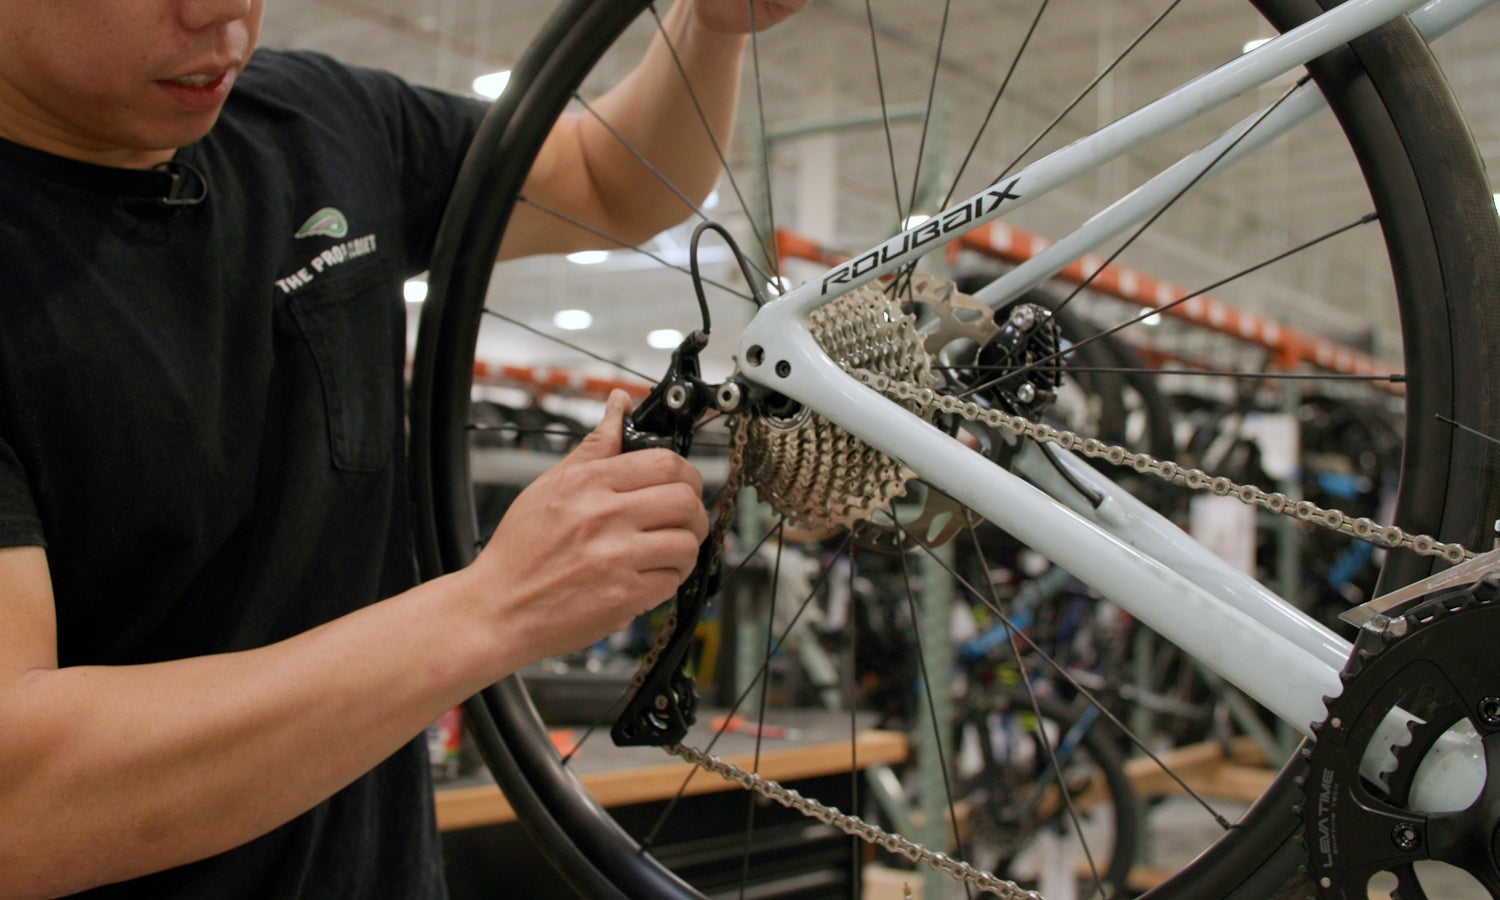
To change a rear bike tire, first, remove the wheel from the bike frame. Then, deflate the tire and detach it from the rim.
Changing a rear bike tire is essential for maintenance and ensuring a smooth ride. Regular checks and timely replacements can prevent unexpected breakdowns. The process may seem daunting at first, but with the right tools and a bit of practice, it becomes straightforward.
Knowing how to change a rear tire can save you time and money, avoiding trips to the bike shop. This skill is crucial for all cyclists, whether you're commuting, mountain biking, or enjoying a leisurely ride. Always have a spare tube and tire levers handy for quick and efficient tire changes on the go.

Credit: www.sixthreezero.com
Tools And Materials
Changing your rear bike tire can be easy with the right tools and materials. This section will help you gather everything you need for a smooth tire change.
Essential Tools
Before you start, make sure you have these essential tools:
- Bike Pump: To inflate the new tire.
- Tire Levers: For removing the old tire.
- Wrench: To loosen the wheel nuts.
- Patch Kit: In case the inner tube needs repairing.
- Multitool: Handy for various adjustments.
Necessary Materials
In addition to tools, you will need the following materials:
- New Tire: Ensure it matches your bike's size.
- Inner Tube: A new or spare tube.
- Lubricant: To ease tire installation.
- Rags: For cleaning and wiping hands.
Once you have gathered all these tools and materials, you are ready to change your rear bike tire. Having everything prepared makes the process faster and easier.

Credit: www.theproscloset.com
Preparation Steps
Changing a rear bike tire can seem daunting, but it's straightforward. Preparing correctly ensures the process is smooth and safe. Follow these preparation steps to make the task easier.
Safety Precautions
Safety is the top priority. Before starting, gather the necessary tools. You will need:
- Bike repair stand or a sturdy alternative
- Tire levers
- Spare tube
- Air pump
- Gloves to keep hands clean
Wear gloves to protect your hands. Ensure you have a clean, safe workspace. This reduces the risk of injury. Inspect the bike for any sharp objects. These can cause punctures or injuries.
Bike Positioning
Proper bike positioning is crucial. Follow these steps:
- Flip your bike upside down. Rest it on the saddle and handlebars.
- Use a bike repair stand if available. This makes the process easier.
- Ensure the bike is stable before proceeding. This prevents accidents.
Once your bike is secure, you can start working on the tire. A stable bike makes the task much easier and safer.
Removing The Wheel
Removing the wheel from your bike is the first step in changing the rear tire. This process involves a few key steps: loosening the brakes and releasing the quick release. Follow these steps to get your wheel off quickly and safely.
Loosening The Brakes
First, you need to loosen the brakes. This will give you enough space to remove the wheel. Here's how to do it:
- Locate the brake calipers.
- Find the quick-release lever on the brake.
- Open the lever to release the brake tension.
This step is crucial to avoid any damage to your bike or tire. Make sure the brakes are fully loosened before moving on.
Releasing The Quick Release
Next, you need to release the quick release on the wheel. This will allow you to remove the wheel from the bike frame. Follow these steps:
- Locate the quick-release lever on the axle.
- Flip the lever to the open position.
- Hold the lever and turn the nut on the other side.
- Keep turning until the wheel is loose.
Once the wheel is loose, you can easily lift it out of the frame. Make sure to hold the bike steady as you do this.
By following these steps, you can quickly remove the rear wheel and get started on changing your tire.

Credit: m.youtube.com
Taking Off The Tire
Changing a rear bike tire starts with taking off the tire. This step needs a careful approach. Follow these instructions to do it properly.
Deflating The Tire
First, you need to deflate the tire. Turn your bike upside down. Make sure it is stable. You can use a bike stand or lean it against a wall.
Locate the valve on the tire. Press the small pin inside the valve to release air. If your bike has a Presta valve, unscrew the top before pressing the pin. For Schrader valves, just press the pin. Let all the air out until the tire is completely flat.
Using Tire Levers
Next, you will need tire levers. These tools help you remove the tire from the rim. Insert the first tire lever under the edge of the tire. Push it down to lift the tire over the rim.
Leave the first lever in place. Insert the second lever a few inches away from the first. Slide the second lever around the rim. This will loosen the tire further. Continue this process until the tire is completely off.
Be careful not to damage the inner tube. Remove the inner tube after the tire is off. Now you are ready for the next steps in changing your rear bike tire.
Inspecting The Tube
After removing the rear bike tire, the next step is to inspect the tube. Proper inspection can prevent future punctures and ensure a smooth ride. This step involves checking for damage and cleaning the rim.
Checking For Damage
First, carefully inspect the tube for any visible damage. Look for punctures, tears, or worn-out spots. Inflate the tube slightly to make it easier to find holes.
- Check for small punctures using a bucket of water.
- Submerge the tube and look for air bubbles.
- Mark any holes you find with chalk or a marker.
Pay attention to the valve stem as well. Ensure it is not bent or leaking. If the tube shows significant damage, replace it to avoid future problems.
Cleaning The Rim
Before installing a new tube, clean the bike's rim. Dirt and debris can cause punctures.
- Use a clean cloth to wipe down the rim.
- Check the rim for sharp edges or embedded objects.
- Remove any small stones or glass pieces.
Ensure the rim tape is in good condition. Replace it if it looks worn or damaged. This step ensures a smooth ride and prolongs the life of your new tube.
| Step | Action | Tools Needed |
|---|---|---|
| 1 | Inspect Tube | Bucket, Water, Chalk |
| 2 | Clean Rim | Cloth |
Following these steps for inspecting the tube can save you time and effort. Ensuring the tube and rim are in excellent condition leads to a better biking experience.
Installing The New Tube
Changing a rear bike tire might seem tough. But, installing the new tube is easy with the right steps. This section will guide you through inflating the tube and positioning it inside the tire.
Inflating The Tube
Before placing the tube inside the tire, inflate it a little. This helps the tube keep its shape. Use a hand pump or floor pump. Add just enough air so the tube is round but not tight.
Positioning Inside The Tire
Now, put the tube inside the tire. Start by placing the valve through the hole in the rim. Make sure the valve sits straight. Then, work the rest of the tube into the tire. Use your fingers to gently push it in.
Ensure the tube is not twisted. Check that it sits evenly inside the tire. Now, you are ready to mount the tire back on the rim.
Reattaching The Tire
Reattaching the tire is a crucial step in maintaining your bike. A properly reattached tire ensures a safe and smooth ride. Follow these steps to get your tire back on in no time.
Seating The Bead
First, align the tire bead with the rim. The bead is the edge of the tire that fits into the rim. Start at the valve stem and work your way around.
Use your hands to push the bead into the rim. Ensure that the tire sits evenly. Check both sides to confirm the bead is seated properly.
If the bead is not seated, the tire may wobble. This could lead to unsafe riding conditions.
Inflating To Proper Pressure
Once the bead is seated, it's time to inflate the tire. Check the sidewall of the tire for the recommended pressure. Use a reliable tire gauge.
Attach the pump to the valve and start inflating. Monitor the pressure closely. Over-inflation can cause the tire to burst.
Inflate the tire until it reaches the recommended pressure. Finally, remove the pump and ensure the valve is secure.
Your tire is now ready for a safe ride. Remember to check the pressure regularly.
Reinstalling The Wheel
Reinstalling the rear bike tire is a crucial step. Ensuring the wheel is properly aligned and secured is essential for safety. Let's break down the process step by step.
Aligning The Wheel
First, position the wheel back into the frame's dropouts. Ensure the axle fits snugly. The wheel should sit straight in the frame. Misalignment can cause wobbling and unsafe riding.
Next, check that the tire sits evenly between the brake pads. This ensures the brakes function properly. Spin the wheel to verify it rotates smoothly.
Securing The Quick Release
Most modern bikes use a quick release skewer. Begin by inserting the skewer through the axle. Tighten the nut on the opposite side.
Close the quick release lever. It should be firm but not too tight. You should use some force to close it. If it’s too easy, it’s too loose. If it’s too hard, it’s too tight.
Double-check the wheel alignment. Ensure the tire is still centered and the brakes function correctly. Your rear bike tire is now securely reinstalled.
Tip: Always test your bike in a safe area before heading out.
Final Checks
After replacing your rear bike tire, it's crucial to perform final checks. These checks ensure your bike runs smoothly and safely. Let's dive into the steps you need to follow.
Brake Adjustment
First, make sure your brakes are functioning properly.
- Check if the brake pads touch the rim evenly.
- Adjust the brake cable tension if needed.
- Ensure the brake levers respond promptly.
Proper brake adjustment is vital for your safety on the road.
Test Ride
Next, take your bike for a quick test ride.
- Start by riding on a flat surface.
- Listen for unusual noises from the rear tire.
- Test the brakes by stopping suddenly.
Ensure the bike feels stable and secure during the ride. A test ride helps you identify any hidden issues.
By performing these final checks, you ensure a safe and smooth ride.
Frequently Asked Questions
How Do I Remove The Rear Bike Tire?
First, shift to the smallest gear. Release the brake and quick-release lever. Pull the derailleur back and remove the wheel.
What Tools Do I Need To Change A Bike Tire?
You'll need tire levers, a pump, and a new inner tube. Optionally, a multi-tool can be helpful for adjustments.
How Do I Install A New Inner Tube?
Deflate the old tube and remove it. Insert the new tube, inflate slightly, and fit it inside the tire. Ensure it's not pinched.
How Do I Reattach The Rear Bike Tire?
Align the tire with the chain and derailleur. Place it back into the dropouts. Tighten the quick-release lever.
Conclusion
Changing a rear bike tire is simpler than it seems. Follow the steps methodically for a smooth process. With practice, it becomes second nature. Regular maintenance ensures a safe and enjoyable ride. Now, you're ready to hit the road with confidence and ease.
Happy biking!

No comments:
Post a Comment